How to make a network server in minecraft. Building a Good Minecraft Server
So, today I will tell you how to create a minecraft server. To begin with, I will talk about a regular server, and in the next article we will look at running a server on bukkit. That is, today's server will not support mods, but it is quite enough for playing with friends, and installation is easier for him.
In fact, there is nothing difficult here, but many beginners have a bunch of questions related to the process of starting the server, which I will try to answer today in a form that will be accessible even to those who are not particularly computer friendly.
We will install a server for Windows, since I have not met a single person with Linux who could not raise the server 🙂
In order to create a server on our home computer (well, or not on it), we need the software available at the link. This version is best for beginners as it is the most visual, if you just want to play with your friends online then this is a great solution.
And so, we put this file in a separate folder to make it more convenient, and run it. We are waiting for the appearance of a line like " Done (10,146s)! For help, type "help" or "?"". It took me about 10 seconds. Let's stop the server, for this, in the input box on the right-bottom, enter "stop" and press the enter key. Let's now deal with setting up the server, because this is the only way we can get to create a minecraft server exactly the way we need it. Let's look at what appeared in our server folder:
- banned-ips.txt - list of players banned by ip
- banned-players.txt - list of banned players
- ops.txt - a list of ops or, more simply, a list of admins
- server.log - server log. Any information that you are unlikely to need is recorded here.
- server.properties - server settings
- white-list.txt - list of players who have access to the server
Let's take a closer look. The files banned-ips, banned-players, ops and whitelist are the list of players. Each line should have one nickname. If you want, you can enter your nickname in ops.txt, but I recommend using the command, which I will talk about towards the end of the article. Let's dwell on the server.properties file in more detail and consider all its points. Most items can only take the values "true" ("allow") or "false" ("prohibit"). Here is a list of all commands:
- allow-nether=true - whether to allow the nether world on the server
- level-name=world - the name of the world. Specifies the name of the folder where your world will be stored
- enable-query=false - whether to allow requests for server statistics. Leave as is.
- allow-flight=false - allow cheaters to fly? Flight in creative is not affected
- server-port=25565 - server port, in most cases it is not necessary to change it
- level-type=DEFAULT - server type, if you put "FLAT", then you get a flat map
- enable-rcon=false - allows you to get remote access to the console. Don't ask, I don't know how.
- level-seed= - level seed, in order to take effect, you will have to make a wipe (delete the "World" folder)
- server-ip= - in most cases, it should be left empty
- max-build-height=256 - maximum build height (one of: 64, 80, 96, 112, 128, 144, 160, 176, 192, 208, 224, 240, 256)
- spawn-npcs=true - whether to spawn villagers
- white-list=false — whether to enable whitelist
- spawn-animals=true - whether to spawn animals
- online-mode=true - if false, then pirates will be able to enter
- pvp=true - whether to allow pvp
- difficulty=1 difficulty level (0 - Peaceful, 1 - Easy, 2 - Normal, 3 - Hard)
- gamemode=0 - if set to "1", then all players will have a creative
- max-players=20 - number of slots on the server
- spawn-monsters=true - whether to spawn hostile monsters
- generate-structures=true - whether to generate villages, treasuries, fortresses...
- view-distance=10 - visibility range in chunks, I recommend not changing
- motd=A Minecraft Server is the message that is displayed in the server list. Must be no more than 60 characters
Actually, after changing the settings and saving them, you can start the server and enjoy the game. Oh yes, here is the list of commands that is available from the server application itself (where we wrote "stop"). These commands are also available from the game if you are Op. In this case, the command should be preceded by the symbol "/". Here is the list itself:
- help - displays a list of available commands
- kick<ник>- kicks the player (disconnects from the server)
- ban<ник>- bans a player
- sorry<ник>- unbans a player
- ban-ip
- adds an ip address to the banned list - sorry-ip
- removes ip address from the banned list - op<ник>- makes the player Opom
- deop<ник>- Downgrades Op to a regular player
- tp<ник1> <ник2>- transfers the first player to the second
- give<ник>
[amount] - gives the player an item with the given id. Quantity is not required. - tell<игрок> <сообщение>- sends a private message to the player
- stop - stops the server
- save-all - saves the map
- save-off - disables terrain saving, usually not used
- save-on - enables terrain saving
- list - displays a list of players
- say<сообщение>- displays a message in the chat on behalf of the server
- time set<количество>- sets the time. Game day lasts 24000. If you set the time to 0 (time set 0), then we get the morning. And if you put 12000, then the evening
- time add<количество>- adds some amount to the current time
- game mode<ник> <значение>- Changes the player's game type. The value can be 0 (survival) or 1 (creative)
- toggledownfall - toggles rainfall on or off
- xp<ник> <количестве>- gives the player a set amount of experience (0-5000)
That's all, now you know how to create a server in Minecraft have a good game on your server!
If you want to open your own server, but don't know how to do it, then this article will be of interest to you. In minecraft, create a server that will allow you to play with friends or with other players in your own world. There is also an assembly of mods that will decorate your world for the better. The assembly is put without much difficulty. Use various commands, they will allow you to control the game in your world: ban players, change the weather in Minecraft and much more.
You can find a lot of videos on youtube on how to have fun. And also, if you are interested, you can create your own channel and make all your adventures on video. By creating your own server, you will have complete control over it. Minecraft is a game where fantasy is given free rein, so you can evaluate not only your imagination, but also your friends. The assembly of various modifications to the game will fill it with more features. Also, the assembly for the game can be made by the players themselves and distributed across sites. An assembly can be created by combining several mods in minecraft.
You can also put various maps on the server that you can go through with friends. You can install them on our website in the Maps section. You can install them and have fun going through them, you can make them yourself, creating your own world. And if you are planning to create something really cool, if you wish, you can put them up for general download. If players wish, you can create a map of incredible beauty that will justify your work, looking at a beautiful minecraft map.
The commands on the server also play an important role, as already mentioned above, they allow you to “hold the control panel in your hands”. Commands are written so that the server is under your control.
The commands are shown in the screenshot below (CLICK ON THEM):

Creating a server in minecraft
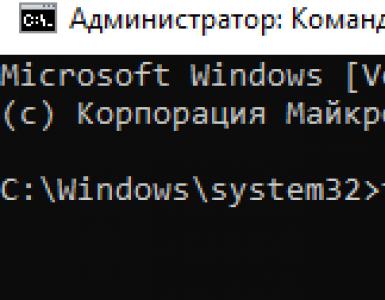
First you need to go to http://www.minecraft.net/download.jsp and you will need to download a file called Minecraft_Server.exe. This is the official site, therefore, it contains all the latest versions.The file that you downloaded Minecraft_Server.exe (or otherwise it is called minecraft_server.jar) needs to be opened and transferred to the folder where you will have the server.
Now let's move on to the ports, you need to open it, but if you have it open 25565, then you will see the following inscription:

Now keep calm and wait until the process for minecraft game comes to an end. Once completed, you will need to close the window.
Another case will be if you have a port closed for minecraft, or some program, such as a firewall, blocks the work of Minecraft_Server.exe or Java, as shown in the picture below. If this happens, try uninstalling java and reinstalling it, a message will pop up from the firewall and you will need to allow the application access.

How to open port 25565. In any case, to begin with, you must allow java access, if, of course, such a window pops up. Of course, you allow java these rights. The screenshot shows an example of blocking.


If everything goes well, then new files will appear in the folder, and the world folder.
We definitely need a file called server.properties. You need to open this file with notepad. Now you should take note of the information that is given below. In order to find out your IP address, you need to go to sites that will show you it. For example, I can cite the site 2ip.ru, where you can freely see your ip address, as shown in the screenshot.

If your ip is changing, and most of it is, then you need to enter to update the server-ip= line before each server start.
Sites that show ip should be bookmarked to make searching easier.
We start and go to our server (c video)
The information is relevant for Minecraft versions 1.2.5, 1.5.2, 1.6.1, 1.6.2, 1.6.4. Next, you need to run Minecraft_Server.exe and wait for the download to finish. We go into minecraft (it is not necessary to enter a username and password).Click on Multiplayer, then Add Server, as shown in the picture below.

Next, you need to enter the server name (this name will be shown in the list) and the server ip
Next, click Done, and you will have the server listed. Green stripes on the right indicate that it is working, and is also shown online. Next, you need to click Join Server.


Done, now you are playing on your own server.
Server in Minecraft to play with friends and acquaintances, make sure that your computer can withstand heavy loads. If your PC cannot provide the server with the necessary resources, then you will need hosting.
In order not to waste precious time, you can find a ready-made server for Minecraft. Download the server, move it to your hard drive or host it. You will need at least 3 GB of free space for the server to run smoothly.
Start the installed server and wait for the game map to load.
In the minecraft-server.jar folder, server.preporites must be configured. Not every player has the official version of the Minecraft game installed, so make the online-mod=false directive so that users of the unlicensed version can join your game.
To give players the rights of server administrators, add their names to the text document ops.txt. Each name is entered on a separate line.
When entering Minecraft, enter the address of the localhost server (if you have placed it on your computer). If the connection is established, then you have made the server in Minecraft correctly.
Invite friends and other users to the game. To join your server they need to know your IP
However, Minecraft from scratch is the best option for those who want to seriously get down to work. The platform for the server can be downloaded from the official website of the game. You can also use the bukkit platform on which Minecraft plugins will be installed.
Set up server.preporites and fill in the admin names in ops.txt, just like you did with the downloaded server. Run server.exe, open a port for the server and wait for the map to load.
Change the necessary server settings:
- True – enable the server, False – disable;
- level-name=minecraft - server folder name;
- allow-nether=true/false - enable or disable the portal to hell;
- view-distance=10 - visibility radius;
- spawn-monsters=true/false - enable or disable monsters;
- online-mode=true/false - setting the ability to play with a licensed or pirated version of the game;
- difficulty=1 - setting the complexity of the world, where 1 - easy, 3 - difficult;
- gamemode=0 - 0 - 1 – ;
- spawn-animals= true/false - enable or disable friendly mob spawns
- max-players=10 - maximum number of players on the server
- server-ip= - server IP
- pvp= true/false - enable or disable pvp
- level-seed= - map seed
- server-port=00000 - server port
- white-list= true/false - enable or disable the white list
- motd=hello - hello phrase on the server
Install the necessary plugins on the Minecraft server. So, MyHome will allow players to get their own home, with the help of WorldEdit and WorldGuard it will be possible to edit sites, AuthMe will be needed to authorize users, MobArena is needed to create mobars for events.
Do not overdo it with the number of plug-ins on your home computer, the more there are, the greater the load will be.
If you want to make a Minecraft server not only for friends, but also for other players, still think about purchasing hosting. Most users of the game are reluctant to go to home servers.
Creating your own local server based on a regular personal computer is a rather complicated and painstaking task. Here you need to understand the following points:
- 1. , and whether you need your own server at all. This is one of the key questions that requires a clear and unambiguous answer from the future administrator.
- 2. What technical resources are at your disposal, and what will be necessary for the operation of a full-fledged server. The minimum technical requirements for creating a "good" server are quite high: the equipment alone will cost 70 - 80 thousand rubles.
Also keep in mind that for the normal operation of the resource (for which you plan to make your own server), you need the server computer to be constantly turned on and work without interruption. Therefore, it is necessary to provide an appropriate power supply.
3. What money are you willing to spend on creating and maintaining the server. In addition to the “hardware” costs indicated above, creating a full-fledged server on a computer requires a dedicated (statistical) ip address and a high speed of receiving and transmitting data (the minimum is 10 Mbps). Accordingly, the provider will have to pay extra for this and conclude an additional contract for the provision of such services.
And before trying to make a server out of a computer, you need to clearly define all these nuances.
How to make a server from a home computer?
To create your own server, you first need to install a multi-user network operating system.
The choice is huge: "Debian", "FreeBSD", "CentOS", "OpenSUSE", "Ubuntu", "Windows" and many others.
On the net, you can find many examples of testing the operation of the above operating systems and their rating in accordance with the test results. For example, the SOS rating for 2016:
1st place: "Debian" and "Ubuntu Server";
3rd place: "FreeBSD" and " Windows server»;
4th place: "Red Hat Enterprise";
5th place: "Fedora".
Of course, the lion's share of the network software market is made up of operating systems that occupy the first place in the ranking. Therefore, in order to create a server on a computer for the first time, we recommend choosing one of them.
As part of the example, we will focus on installing the Ubuntu Server operating system.
How to set up a local server from scratch on ubuntu?
1. Download and bring the image of the operating system to a bootable USB flash drive. Boot the computer from the flash drive: at the first stage, you will be asked to select a language.

3. In the following steps, select "Region" and "Keyboard Layout Settings";


4. Specify the username, computer account and password,

then click "Continue";


configure "Disk Partition"

and select on which disk the system is installed;

6. Wait for the installation and system update to complete.
7. Select the software that you need to work.

8. Confirm the completion of the installation by clicking on the "Continue" button;

9. After restarting the computer, to enter the account, you will need to enter the login and password created in step "4";
10. This completes the installation of the server operating system and the initial creation of the server.
How to make yourself an admin on your server?
- 1. To obtain administrator rights, enter the command "sudo su";
- 2. By default, the server's network settings come through DHCP, but for the server to work, you will need to change the value of "iface eth0 inet static" in the "/etc/network/interfaces" file to "static ip address". The text should look something like this:
iface eth0 inet static
address 192.168.0.100
netmask 255.255.255.0
network 192.168.0.0
broadcast 192.168.0.255
gateway 192.168.0.1
After saving, restart the network with the "/etc/init.d/networking restart" command.
As exciting as Minecraft's single player mode is, multiplayer where you can play with friends is much more interesting. There are several ways to play Minecraft in multiplayer. One is to create a Minecraft server that you and your friends can connect to. Of course, existing servers can also be used for this purpose.
In this guide, we will show you how to create a Minecraft server for yourself and your friends on your home PC.
First you need to download the .jar version of the server
Put the downloaded jar file in a folder. It doesn't matter where she is. Next, you need to prepare a file that will start your server.

Create a batch file
Create a new text document and add the following lines to it:
@echo off
title run-minecraft
java -Xms1024M -Xmx2048M -jar minecraft_server.jar nogui
pause
This means we want java to run our "minecraft_server.jar" server with 1024 megabytes (1 gigabyte) of ram. If an error appears, reduce the RAM values to 512 MB, it helped me and the server started!
To run a server with more memory, simply change the -xms and -xmx values. Moreover, they should be equal to the numbers 64, 128, 256, 512 and so on.
To save the file in .bat format, click the File button in the upper left corner of the screen, select Save As, then select All Files under the File Name field. It is very important. Name your file start or start server and click save. Then change the file extension from .txt to .bat
Or you can download my bat file here: (to change it, right-click on the file and select "Edit").
User agreement and server launch
After completing the previous step, start your server. At first, it will close instantly as you need to accept the user agreement. To do this, open the text document with the agreement that appears in the folder, change the line eula=false to eula=true, save it and restart the server.

Your server should start normally and start generating the world and creating other important files like server.properties, whitelist, banned-players and so on.

Server connection
To connect to the server we just created, you, as the owner, just need to go into multiplayer and add the server, specifying "localhost" as the IP address.
As for your friends, you can give them your external IP address, to find out, go to the site 2ip.ru. In addition, your router should have ports 25565 to 25566 forwarded. An excellent video on port forwarding can be found below.
I hope this short guide will help you create a Minecraft 1.8 server for yourself and your friends, and then have a good time together! If you have any questions, ask them in the comments below!