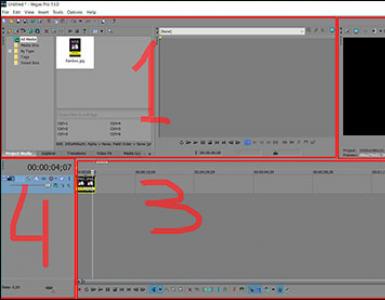
Page builder wordpress как сделать всплывающие. Как создать макеты с пользовательских страниц на WordPress Beaver Builder
Атрибуты
Атрибуты показанные ниже включаются так -X , а выключаются +X . (Такая перевернутая схема включения/выключения пришла в bash исторически, т.к. опции обычно включались в виде -X . Прямо как с электрическим зарядами)
| Флаг |
Название опции | Описание |
|---|---|---|
| -a | allexport | Автоматически отмечает измененные переменные. Automatically mark new and altered variables to be exported to subsequent environments. |
| -b | notify | Не ждет нажатия enter чтобы оповестить о завершившемся в фоне job-е. (Оповещения работают только для управления job-ами) |
| -e | errexit | When set, the shell exits when a simple command in a command list exits non-zero (FALSE). This is not done in situations, where the exit code is already checked (if , while , until , || , &&) |
| -f | noglob | Отменяет (globbing) |
| -h | hashall | Запоминает абсолютное расположение команды если она вызывалась, и использует в следующий раз этот путь (хеширование). Включено по-умолчанию. (см checkhash из списка опций
shopt) |
| -k | keyword | Разрешает подставлять значение перемернной среды окружения везде в командной строке, а не только во время вызова команды. |
| -m | monitor | Monitor mode . При управлении job-ами будет выведено короткое описание завершенного в фоне задания. По-умолчанию включено для для интерактивных оболочек с управлением job-ами. |
| -n | noexec | Читает и парсит команды из скрипта, но не исполняет их . Полезно для проверки сценария на предмет синтаксических ошибок. Игнорируется интерактивными оболочками. |
| -o | Устаналивает или снимает опцию по её длинному имени. Например set -o noglob . Если никакой опции не задано, то выводится список всех опций и их статус. | |
| -p | privileged | Включает привилегированный режим. |
| -t | onecmd | Выходит после чтения и выполнения одной команды. |
| -u | nounset | Рассматривает сброс (unset) переменной как ошибку при выполнении parameter expansion. Неинтерактивные оболочки завершают свое выполнение при такой ошибке. |
| -v | verbose | Выводит прочитанные или введенные строки при выполнении. Полезно при отладке. |
| -x | xtrace | Режим отладки. Перед выполнением команды печатает её со всеми уже развернутыми подстановками и вычислениями. |
| -B | braceexpand | Оболочка осуществляет раскрытие скобок. . Эта опция включена по-умолчанию. |
| -C | noclobber | Не перезаписывает файлы в операциях перенаправлениях потока. Вы можете обойти это ограничение используя оператор перенаправления >| там где это необходимо. Смотрите |
| -E | errtrace | ERR -ловушки будут наследоваться функциями оболочки, подстановками команд и командами которые выполняются в окружении подоболочки. |
| -H | histexpand | Разрешены подстановки из истории команд (! -style). По умолчанию включено для интерактивных оболочек. |
| -P | physical | Не следовать по симлинкам когда изменяются директории, use the physical filesystem structure. |
| -T | functrace | DEBUG - и RETURN -ловушки будут унаследованы последующими средами. Аналогично как -E для ERR -ловушек. |
| - | Означает "конец опций" - все следующие аргументы будут рассматриваться как позиционные параметры, даже если начинаются с минуса, как опции. | |
| -- | If no arguments follow, the positional parameters are unset. With arguments, the positional parameters are set, even if the strings begin with a - (dash) like an option. | |
| Длинные опции, -o у которых нет короткого экивалента. | ||
| emacs | Включает emacs -стиль для редактирования команд. По-умолчанию включена. | |
| history | Ведется история команд. Включена по-умолчанию для интерактивных оболочек. |
|
| ignoreeof | Такой же эффект как и команды IGNOREEOF=10 . Смотрите shell variables . | |
| nolog | (В настоящее время игнорируется. currently ignored) | |
| pipefail | If set, the exit code from a pipeline is different to the normal ("last command in pipeline") behaviour: TRUE when no command failed, FALSE when something failed (code of the rightmost command that failed) | |
| posix | Когда эта опция установлена - Bash работает в режиме POSIX . | |
| vi | Включает | |
Устанавливает, удаляет и просматривает переменные среды. Вызванная без параметров, команда set выводит список установленных переменных среды и их значений.
Синтаксис
set [[/a [выражение ]] [/p [переменная = ]] строка ]
Параметры
/a Указывает, что параметр строка является вычисляемым числовым выражением. /p Задает значение переменной строкой ввода. переменная Указывает имя переменной, значение которой требуется задать или изменить. строка Задает строковое значение для указанной переменной. /? Отображает справку в командной строке.Примечания
- Использование команды set
в консоли восстановления
Команда set с другими параметрами доступна в консоли восстановления.
- Использование специальных символов
Символы <, >, |, &, ^ являются специальными символами командной оболочки, необходимо либо ставить перед ними управляющий символ (^), либо заключать в кавычки, при использовании символов в параметре строка (например, " строка_содержания& символ " ). При заключении в кавычки строки, содержащей специальные символы, кавычки считаются частью значения переменной среды.
- Использование переменных среды
Переменные среды используются для управления работой некоторых пакетных файлов и программ и для управления работой Windows XP и подсистемы MS-DOS. Команда set часто используется в файле Autoexec.nt для установки переменных среды.
- Вывод текущих установок среды
Когда команда set вызвана без параметров, на экран будут выведены текущие установки. Обычно эти установки включают переменные COMSPEC и PATH, используемые для поиска программ на диске. Две другие переменные среды, используемые Windows это PROMPT и DIRCMD.
- Использование параметров
При указании значений для переменной и строки значение переменной добавляется к окружению, а строка ставится в соответствие этой переменной. Если переменная уже существует, новое значение замещает старое значение.
Если в команде set указано только имя переменной и знак равенства (без значения), какое-либо значение больше не будет ставиться в соответствие переменной среды, что эквивалентно удалению переменной среды.
- Использование /a
В следующей таблице представлены операторы, поддерживающие параметр /a , в порядке убывания очередности.
При использовании логических операторов (&& ||) или оператора остатка от деления (%) заключайте выражение строки в кавычки. Любые нечисловые строки в выражении считаются именами переменной среды, чьи значения преобразованы в числа до обработки. Если указано имя переменной среды, которое не определено в текущем окружении, ей присваивается значение нуля, что позволяет выполнять арифметические операции со значениями переменной среды без использования % для получения значения.
При выполнении команды set /a из командной строки вне командного сценария, выводится конечное значение выражения.
Численные значения это десятичные числа, кроме чисел с префиксами 0x для шестнадцатеричных чисел и 0 для восьмеричных чисел. Таким образом, 0x12 тоже самое, что 18 и 022. Восьмеричное представление требует аккуратности. Например, 08 и 09 недопустимы, потому что 8 и 9 не являются восьмеричными цифрами.
- Использование /p
Используется, когда не требуется включать командную строку.
- Поддержка расширения переменной среды с задержкой
Добавлена поддержка расширения переменной среды с задержкой. Эта поддержка отключена по умолчанию, можно включить или отключить ее с помощью команды cmd /v .
- Работа с расширениями команды
При включенных расширениях команды (установлено по умолчанию) и выполнении команды set без значений, на экран выводятся все текущие переменные среды. Если же выполняется команда set со значением, отображаются переменные, соответствующие этому значению.
- Использование команды set
в пакетных файлах
При создании пакетных файлов, используйте команду set для создания переменных и использовании их в качестве числовых переменных от %0 до %9 . Также можно использовать переменные от %0 до %9 как ввод для команды set .
- Обращение к переменным команды set
из пакетных программ
При обращении к переменной из пакетной программы имя переменной должно быть заключено в знаки процентов (%). Например, если в пакетной программе создается переменная BAUD, с ней может быть связан заменяемый параметр путем использования имени %baud% в командной строке.
Примеры
Чтобы задать переменную среды с именем TEST^1, введите команду:
set testVar=test^^1
Чтобы задать переменную среды с именем TEST&1, введите команду:
set testVar=test^&1
Значением переменной команды set определяет все, что следует за знаком равенства (=). При вводе:
set testVar="test^1"
Результат будет следующим:
testVar="test^1"
Для установки переменной среды INCLUDE так, чтобы с ней была связана строка C:\Inc (каталог Inc на диске C), можно использовать следующую команду:
set include=c:\inc
Строку C:\Inc можно использовать в пакетных файлах, заключив имя INCLUDE в знаки процента (%). Например, в пакетном файле можно использовать следующую команду для вывода содержимого каталога, на который указывает переменная среды INCLUDE:
При выполнении команды строка %include% будет заменена строкой C:\Inc.
Можно также использовать команду set в пакетной программе, которая добавляет новый каталог к переменной среды PATH. Например:
@echo off
rem ADDPATH.BAT добавляет новый каталог
rem к переменной среды path.
set path=%1;%path%
set
При включенных расширениях команды (установлено по умолчанию) и выполнении команды set со значением, на экран выводятся все переменные среды, соответствующие значению. Например, при вводе в командную строку: set p , результат будет следующим:
Path=C:\WINNT\system32;C:\WINNT;C:\WINNT\System32\Wbem
PATHEXT=.COM;.EXE;.BAT;.CMD;.VBS;.VBE;.JS;.JSE;.WSF;.WSH
PROCESSOR_ARCHITECTURE=x86
PROCESSOR_IDENTIFIER=x86 Family 6 Model 8 Stepping 1, GenuineIntel
PROCESSOR_LEVEL=6
PROCESSOR_REVISION=0801
ProgramFiles=C:\Program Files
PROMPT=$P$G
Некоторые приемы и особенности работы с командой Set можно посмотреть в разделе Арифметическая обработка данных .
Для вопросов, обсуждений, замечаний, предложений и т. п. можете использовать раздел форума этого сайта (требуется регистрация).
If Command Extensions are enabled SET changes as follows:
SET command invoked with a variable name , no equal sign or value displays the value of all variables whose prefix matches the name given to the SET command. For example:
would display all variables that begin with the letter "P."
SET command will set the ERRORLEVEL to 1 if the variable name is not found in the current environment.
SET command will not allow an equal sign to be part of the name of a variable.
Two new switches have been added to the SET command:
SET /A expression
SET /P variable=
The /A switch specifies that the string to the right of the equal sign is a numerical expression that is evaluated. The expression evaluator is pretty simple and supports the following operations, in decreasing order of precedence:
| () - grouping | |
| * / % | Arithmetic operators. |
| + - | Arithmetic operators. |
| << >> | Logical shift. |
| & | Bitwise and. |
| ^ | Bitwise exclusive or. |
| | | Bitwise or. |
| = *= /= %= += -= &= ^= |= <<= >>= |
Assignment. |
| , | Expression separator. |
If you use any of the logical or modulus operators, you need to enclose the expression string in quotes. Any non-numeric strings in the expression are treated as environment variable names whose values are converted to numbers before using them. If an environment variable name is specified but is not defined in the current environment, then a value of zero is used. Doing this allows you to do arithmetic with environment variable values without having to type all those % signs to get their values. If SET /A is executed from the command line outside of a command script, then it displays the final value of the expression. The assignment operator requires an environment variable name to the left of the assignment operator. Numeric values are decimal numbers unless prefixed by 0x for hexadecimal numbers, and 0 for octal numbers. So 0x12 is the same as 18 is the same as 022. Note: the octal notation can be confusing: 08 and 09 are not valid numbers because 8 and 9 are not valid octal digits.
The /P switch allows you to set the value of a variable to a line of input entered by the user. Displays the specified promptString before reading the line of input. The promptString can be empty.
Environment variable substitution has been enhanced as follows:
%PATH:str1=str2%
would expand the PATH environment variable, substituting each occurrence of str1 in the expanded result with str2 . str2 can be the empty string to effectively delete all occurrences of str1 from the expanded output. str1 can begin with an asterisk, which matches everything from the beginning of the expanded output to the first occurrence of the remaining portion of str1.
May also specify substrings for an expansion.
%PATH:~10,5%
would expand the PATH environment variable, and then use only the 5 characters that begin at the 11th (offset 10) character of the expanded result. If the length is not specified, then it defaults to the remainder of the variable value. If either number (offset or length) is negative, then the number used is the length of the environment variable value added to the offset or length specified.
%PATH:~-10%
would extract the last 10 characters of the PATH variable.
%PATH:~0,-2%
would extract all but the last 2 characters of the PATH variable.
Finally, support for delayed environment variable expansion has been added. This support is always disabled by default, but may be enabled/disabled via the /V command line switch to CMD.EXE. See CMD /?
Delayed environment variable expansion is useful for getting around the limitations of the current expansion that happens when a line of text is read, not when it is executed. The following example demonstrates the problem with immediate variable expansion:
Set VAR=before if "%VAR%" == "before" (set VAR=after; if "%VAR%" == "after" @echo If you see this, it worked)
would never display the message, because %VAR% is expanded when the lie is read into memory. Changes that occur to the variable after that (such as VAR=after in our compound if statement) will not be expanded.
Similarly, the following example will not work as expected:
Set LIST= for %i in (*) do set LIST=%LIST% %i echo %LIST%
in that it will NOT build up a list of files in the current directory, but instead will set the LIST variable to the last file found. Again, this is because the %LIST% is expanded once when the FOR statement is read, and at that time the LIST variable is empty. So the actual FOR loop we are executing is:
For %i in (*) do set LIST= %i
which keeps setting LIST to the last file found.
Delayed environment variable expansion allows you to use a different character (the exclamation mark) to expand environment variables at execution time. If delayed variable expansion is enabled, the above examples could be written as follows to work as intended:
Set VAR=before if "%VAR%" == "before" (set VAR=after if "!VAR!" == "after" @echo If you see this, it worked) set LIST= for %i in (*) do set LIST=!LIST! %i echo %LIST%
If Command Extensions are enabled, then there are several dynamic environment variables that can be expanded, which don"t show up.
The list of variables displayed by SET. These variable values are computed dynamically each time the value of the variable is expanded. If the user explicitly defines a variable with one of these names, then that definition will override the dynamic one described below:
%CD% - expands to the current directory string.
%DATE% - expands to current date using the same format as DATE command.
%TIME% - expands to current time using the same format as TIME command.
%RANDOM% - expands to a random decimal number between 0 and 32767.
%ERRORLEVEL% - expands to the current ERRORLEVEL value
%CMDEXTVERSION% - expands to the current Command Processor Extensions version number.
%CMDCMDLINE% - expands to the original command line that invoked the command processor.
Windows 2000 and Windows XP recovery console syntax
set =
| allowwildcards allowallpaths allowremovablemedia nocopyprompt |
|
| Setting the enviroment_variable to true enables the enviroment_variable. By default, these are set to False . |
MS-DOS, Windows 95, Windows 98, Windows ME syntax
Displays, sets, or removes Windows environment variables.
SET ]
| variable | Specifies the environment variable name. |
| string | Specifies a series of characters to assign to the variable. |
Type SET without parameters to display the current environment variables.
Set examples
set path=c:\windows\commandSet the path to c:\windows\command.
Notice: Users in Microsoft Windows 2000 and Windows XP may have difficulty defining the set values through the MS-DOS prompt. See the link below for setting variables within Windows.
setDisplay all of the set environment variables currently defined.
How to use the set command as a substitute for the choice command in Windows 2000 and Windows XP
In the example below, a user would be prompted to enter an option of 1,2, or 3 to print hello , bye , or test .
@ECHO off
cls
:start
ECHO.
ECHO 1. Print Hello
ECHO 2. Print Bye
ECHO 3. Print Test
set choice=
set /p choice=Type the number to print text.
if not "%choice%"=="" set choice=%choice:~0,1%
if "%choice%"=="1" goto hello
if "%choice%"=="2" goto bye
if "%choice%"=="3" goto test
ECHO "%choice%" is not valid, try again
ECHO.
goto start
:hello
ECHO HELLO
goto end
:bye
ECHO BYE
goto end
:test
ECHO TEST
goto end
:end
Secret commands
If you wanted to hide all your directories from users, you could use:
SET DIRCMD=0
The above command prevents anyone from seeing the directories; however, they can still be accessed. To allow the directories to be visible again, type the command below.
Firstly, we would like to thank you for purchasing Pav Fashion and chosen it for your website. We outline all kinds of good information, and provide you with all the details you need to use Pav Fashion.
If you are unable to find your answer here in our documentation, feel free to ask for help from our support team, all you have to do is submitting a ticket via our .
Opencart 2.x and Layout Builder
Pav Opencart is native with OpenCart 2.x, the latest version of OpenCart and it"s powered with the best Opencart page builder, you can check out the video tutorial
Here are some significant changes in Opencart 2.x
- Google reCAPTCHA added for contact page and product reviews
- Amazon Login and Pay module added
- Global Payments module added
- PayPal merchant on boarding added to PayPal Express module
Pavo Fashion OpenCart theme Overview
Pav Fashion is a responsive OpenCart theme for Fashion, High - tech, and Beauty. The OpenCart theme is developed with Pavo Framework version 4, LESS, it integrates Bootstrap 3, Font Awesome, supports HTML5 and CSS3. Pav Fashion menu system is powerful with MegaMenu and Off-canvas.
The theme also supports many modules that will help you save time and money to build a full functionality E-commerce website.
- Pav MegaMenu
- Pav Vertical MegaMenu
- Theme Control Panel
- Pav Home Page Builder
- Pav Blog Category Module
- Pav Blog Latest Comment Module
- Pav Blog Latest Module
- Pav Blog Management
- Pav Carousel
- Pav Category Banner
- Pav Custom Module
- Pav Deals
- Pav Layers Sliders
- Pav Newsletter
- Pav Product Carousel
- Pav Product Tabs
You can have a complete E-commerce website in some simple steps with our sample data package included when you install the theme.
Download and Installation
The instruction is to help you with installation of the Pav Fashion.
Download packages
To download Pav Fashion, please check it out at:
Once the download is complete, unzip the file and you would see the following packages:
- Guides - our detail documentation for the theme
- Quickstart package - for quickstart installation
- Theme folder - for manual installation
- Modules - the installation packages of all modules used in the theme
- Source - the PSD files of the theme
- Licensing - the theme license
System Requirements
OpenCart requires certain technical requirements to be met for the store to operate properly. First, a web server must be created to make the OpenCart store publicly available on the web. Domain names and hosting services can easily be purchased for an affordable price.
When selecting a hosting service, you should check to see that these server requirements are provided and installed on their web servers:
- Web Server (Apache suggested)
- PHP (at least 5.3)
- Curl enabled
- Database (MySQLi suggested)
Quickstart Installation
The Quickstart Package includes Opencart core, Pav Fashion theme, Extensions supported for the theme, and Sample data. Quickstart is the best choice for beginner to explore back-end settings and for new site building. Installing the Quickstart steps is just like Opencart installation, after the step, you will have a site that is exactly the same as our demo site.
Installing in Localhost or installing on your hosting is almost the same. Here is the quick guide to install Quickstart in localhost.
- Step 1 - Create a folder in htdocs folder for Xampp, www folder for Wamp
- Step 2 - Unpack the Quickstart package then copy all the files and folders to the new created folder.
- Step 3 - Create database: You can create a database in your hosting provider"s control panel, for example cPanel. It may also be possible to do so in phpMyAdmin. Remember to take note of the details that you use as you"ll need them for the next step.
- Step 4 - Auto - installer: The final step is to run the auto-installer. Open your favourite web browser and add “/install” to the end of your site"s website address. When doing this you should see with the following page:
The 4 steps in the auto-installer wizard.
- Accept License: Click “Continue” after reading the GNU licence.
- Pre-Installation: The pre-installation page checks that your server meets the minimum requirements. If there are any issues then you may need to contact your hosting provider. Assuming that everything is okay, click the “Continue” button.

- Configuration: In section one, enter the database details that you used in step 3 and in section two enter your desired admin username, password and email address. Once all of the information is entered, click the “Continue” button.

- Finished: That"s it! Now delete or rename the installation directory and you"re DONE.

Theme Installation
Before you install this theme:
- Read our complete instruction to install theme
- Make sure you have installed and running the correct version of OpenCart: OpenCart 2.x
- Take a FULL BACKUP for your site
We recommend to use this theme on a new, clean installation shops without custom core modifications.
Steps to install Pav Fashion Theme manually:
Step 1 - Unzip the theme package
After unzip the download package, please unzip the theme package - pav_fashion_themes_unzip.zip
Step 2 - Upload theme to your OpenCart site root directory

Module Installation
Step 1 - Unzip the module package
Step 2 - Upload the folder admin, catalog,... in the Module package that you want to install to the root directory of your OpenCart site

Step 3 - When you install Fashion theme manually, please unzip the Quickstart file: pav_fashion_full\pav_fashion_quickstart.zip\image. Then go to image folder and copy to theme folder.
Step 4 - After uploading all the folders, you can install it as Quickstart installation
Step 5 - Go to your OpenCart site admin panel, navigate to: Extensions → Modules , find the module you just uploaded then hit the "Install" button to proceed with the module installation.
After installing all modules, please navigate to Design → Layouts
Click on the Edit button to choose the page you need to edit then click on the Add module button.

Choose any module you want and assign the position for it

Theme Configuration
Supported themes/layouts
Pav Fashion is a 4 in 1 OpenCart theme. It supports 4 themes/layouts. Each theme/layout supports 2 skins: Default, Dark. It has different style and different layout structure.
1. Fashion home 1 theme/layout

2. Fashion home 2 theme/layout

3. Fashion home 3 theme/layout

4. Fashion home 4 theme/layout

Active Theme
Once the theme is uploaded, access your admin panel, navigate to: Admin > Extensions > Themes . Next, select Edit button.

And set Pav Fashion General section as your default store.
In here, you can configure the image size for category, product thumbnail, product popup, etc that fit your layout best

Image Size Adjustment
To configure the logo and favicon for theme, please navigate to: Admin > System > Settings and select Edit button.

Next, select Image tab and set store logo and icon for theme.

Theme Control Panel Setting
Pav Fashion supports Theme Control Panel module that allows you to manage your theme and customize your theme easily based on tons of options built in such as Custom Font, Layout management, compression, etc.
From your OpenCart site admin panel, go to Admin > Extensions > Modules , open the setting panel of Theme Control Panel module.

General Settings
In the General setting, you can see a lot of settings. The screenshot below is based on our Demo site.

Here are the main things that you can do with the General setting panel.
- Select theme for your site: Default or Dark.
- Theme layout width: You can design width for your layout or using auto mode by adding auto in the Theme Layout Width field.
- Using customized copyrights info or not
- Enable or disable OffCanvas Sidebars
- Enable Panel Tool: The tool is to quickly change theme, layout, header layout, etc on front-page of your site
- Enable Catalog Mode: Enable or disable Add to cart product.
- Using Main Content Home FullWidth or not
- Templage Layout Mode: Select mode for your template layout - Full Width, Boxed Large, Boxed Medium
- Header Layout: Choose header for theme: default, fullslide, home3 or home4.
- Enable Quickview: Enable or disable Quickview product
- Logo Type: Choose Logo In Theme or Logo OpenCart
- Product In Listing Layout: Choose Default or Swap image
- StickyMenu: Choose Fixed or No Fixed
Pages Settings
Depend on page type, there are different settings. Select the page you want to edit then change the page setting using the available parameters.

Font Settings
The Font setting panel allows you to customize font for your whole site or for specific elements in your site such as heading, module heading, body. Google Font is supported.

Static Modules Settings
Static module is a OpenCart static module, depend on theme type, there are different modules. Select the module you want to edit then change the static module settings.
1. Logo
![]()
4. Call Us

Monday - Friday .................. 8.00 to 18.00
Saturday ......................... 9.00 to 21.00
Sunday ........................... 10.00 to 21.00
5. Contact Us

Warehouse & Offices
12345 Street name, California, USA
Retail Store
54321 Street name, California, USA
0123 456 789 / 0123 456 788
Layout Settings
Thanks to the Pavo Framework version 4, Pav Fashion comes with powerful theme configuration admin panel that allows you to customize the theme easily without touching any file. You can customize font, changing logo, changing skin, etc.
Sample Data Settings
Sample data is an important part of any site, importing, exporting back-up sample data is a regular work. It"s quite complex and risky if you do it manually. Theme Control Panel module helps you solve all the difficulties with the Sample Data management system.

CSS and JS Compression
Compression Feature allows to speed up your site by merging, compressing JS and CSS files.
All cached files are stored in folder system/cache/pavo-assets/ . To clear cached you click to CLEAR button on the top right side corner of your setting panel.

CSS and JS Customization
You can add CSS rules and JS to customize for your site. The CSS rules and JS added in the panel will have highest priority so it will override the styles in your CSS files.

Live Theme Customization
This is amazed feature in our product. The feature is to customizing your theme with pre-define parameters such as font size, text color, background color, font family, etc.
Here is the steps to customizing your site with Live Theme Customization
Step 1 - Open the Live Theme Customization panel

Step 2 - Customize your site with pre-defined parameter.
The Live Theme Customization panel includes 2 main sections: the setting panel (include all pre-define parameters) and your site front-page. When you change setting of a parameter, you would see the change in the front-page at the same time.

Step 3 - Save the customization when you"re done by hitting the "Submit" button.
Pav Module Configuration
The module configuration is based on Default demo site, if you use the other layout, the module configuration is expected to be the same.
Pav Fashion supports a lot of Pav modules that help you build a full Ecommerce functionality and help with content building for your site easier. Here is the instruction to use the extension the way they are used in Pav Fashion demo site.
Pav MegaMenu module
Pav MegaMenu module helps you create MegaMenu menu for your Opencart site. The visual configuration panel allows you to see the structure of the menu in front-page. What you change is what you see.

To configure MegaMenu, please go to: Extensions > Modules, find the Pav MegaMenu module then hit the "Edit" button. There are 2 main sections in the panel: the Menu management system and MegaMenu configuration panel.
Menu management system

- Create a new megamenu
- Edit any menu item:
- Change menu item"s position: Update Order
Widget management system
Live Mega Menu Editor button in Pav MegaMenu module.
Filter By Name box or Filter By Group

Create Widget

- Select Widget type:
- Add content for the widget:
MegaMenu Configuration
Live MegaMenu Editor to access the MegaMenu configuration panel.

Pav Vertical MegaMenu module
Pav Vertical MegaMenu module helps you create Vertical MegaMenu menu for your Opencart site. The visual configuration panel allows you to see the structure of the menu in front-page. What you change is what you see.

To configure Vertical MegaMenu, please go to: Extensions > Modules, find the Pav Vertical MegaMenu module then hit the "Edit" button. There are 3 main sections in the panel: The VerticalMenu Management System, Module management system and MegaMenu configuration panel.
Menu management system

The Menu management system allows you to:
- Create a new vertical megamenu : Fill in enough necessary information for your menu such as name, title, description... Remember to Save it before logging out.
- Edit any menu item: Click on edit icon of the menu item you want to edit, then edit the settings of the menu item in the right panel.
- Change menu item"s position: Drag and drop the menu item to change its position, after changing the order of menu items, please hit the Update Order , the saving option in the panel does not save the order change of menu item.
Widget management system
To go to Widget management system, please click on the Live Vertical Mega Menu Editor button in Pav Vertical MegaMenu module.
The widgets are used to assign to MegaMenu. You can create as many widgets as you expect. The content of widget can be chosen from Filter By Name box or Filter By Group : All, Blog, Typo, Opencart, Others and Image.

You can create a new submenu for any widgets by hitting the "Setting" icon or delete the widget that is not used any more.
To create a new widget, please hit the Create Widget icon in the upper right corner.

- Select Widget type: There are a lot of widget types such as Blog, Typo, Opencart, Social, Image, Others.
- Add content for the widget: The content is depend on what widget type you select, add the required info and save the widget.
Vertical MegaMenu Configuration
In the main setting panel of MegaMenu, hit the Live Vertical MegaMenu Editor to access the Vertical MegaMenu configuration panel.

In the configuration panel, you can:
- Create sub-menu for any menu item, assign widget for the sub-menu and configure size of the sub-menu block.
- Add row, column inside created sub-menu block.
- Add class to style for column, row in sub-menu.
- Align sub-menu block: left, right, center
Pav Home Page Builder module
Pav Home Page Builder module is to help you build Homepage layout for your site the ways you want. In short, each layout is built up from blocks, each block contains columns, you can resize the columns and assign widgets to the columns. Each block, column, widget has its own setting to make sure you can build any layout you want.
To configure the module, please go to: Extensions > Modules, find the Pav Home Page Builder module then hit the "Edit" button to go to its setting panel.
Layout Settings
Pav Fashion supports a lot of layouts, you can configure, customize any layout you want easily with the visual layout configuration. You can move a position to any place in the layout, assign any module to a position, etc.
1. Home Default


Quickly edit a module
Hit the Edit icon in the module loaded in the layout and you can edit settings of the module in a popup.

Changing position to any place in the layout
You can move a module to any position inside the layout panel, there are some hard fixed positions, blocks that you can not move such as Header, Footer.

Edit the width of the module for each position
For each module, you can edit the width of the module by dragging and dropping it..

Widget management system
A new point in our framework is used for more widgets instead of using module as before to create a website. It is very easy and friendly with every user. With using this widget, you can save much time and energy. Only a few clicks, you can create a website you expect.
To go to Widget management system, please click on the "+" icon in the bottom position in Pav Home Page Builder Module

Then Add Column and Add Widget


There are two options for you choose in Module Management: Opencart Modules and Widgets
1. Opencart Modules
This Opencart Modules tab allows you to choose our modules: Pav Blog Latest Comment Module, Pav Deals,... or default Opencart module: Banner, Latest, Bestsellers,...

2. Widgets
In Widgets tab, you can choose any widget you want for your website. You can create as many widgets as you expect. The content of widget can be chosen from Filter By Name box or Filter By Group such as: All, Others, Typo, Product, Image, Piechart, Social and Opencart.

When you selected widget type, you need to add content for the widget. The content is depend on what widget type you select, add the required info and save the widget.

Pav Blog module
This is the platform for Blog on Opencart. You can create categories, blog items and get it displayed in front-page brilliantly. The module comes with a lot of settings that allow you to manage your blog post easily. It also includes comment system, a lot of modules such as Category module, Most Read blog module, Latest Comment module and Latest blog module.
To manage Your Blog system, please go to: Extensions > Modules, find the Pav Blog module then hit the "Edit" button to go to its setting panel.

General Settings

Category Page setting


Category Management

Blog Management

Comment Management

Category Module setting


Latest Comment Module setting

Front-end appearance of the module

Latest Module setting

Front-end appearance of the module

Pav Carousel module
The module allows you to add any module to display in carousel. All you have to do is adding modules you want to display in carousel, configure layout, position, max items ...
To configure the module, please go to: Extensions > Modules, find the Pav Carousel module then hit the "Edit" button to go to its setting panel.
Pav Category Banner module
This module is used in Home 2. Pav Category Banner module is to display list of products with banner in the website.
To configure the module, please go to: Extensions > Modules, find the Pav Category Banner module then hit the "Edit" button to go to its setting panel.

Pav Custom module
This module is used in Home 3 and Home 4. The module allows you to create content using HTML added to the content field.
To configure the module, please go to: Extensions > Modules, find the Pav Custom module then hit the "Edit" button to go to its setting panel.
There are a lot of custom HTML used in the site. We will show you one by one.
Pav Deals module

To configure the module, please go to: Extensions > Modules, find the Pav Deals module then hit the "Edit" button to go to its setting panel.
Pav Layers Sliders module

To configure the module, please go to: Extensions > Modules, find the Pav Layers Sliders module then hit the "Edit" button to go to its setting panel.
Pav Newsletter module
Pav Newsletter module is to manage signup newsletter for your site, you can display a SIGN UP FOR NEWSLETTER form in your site where user can add their email in the form to sign up for newsletter. In the back-end, you can create email and send to the subcriber.

To configure the module, please go to: Extensions > Modules, find the Pav Newsletter module then hit the "Edit" button. In the dashboard of the module, please select Frontend Modules to configure for the displaying of the module in front-page.
Pav Product Carousel module
This module is used in Home 3. Pav Product Carousel module is to display list of products in carousel. The products are selected based on: Featured, Latest, Best Seller, Most Viewed, Special, Top Rating.
To configure the module, please go to: Extensions > Modules, find the Pav Product Carousel module then hit the "Edit" button to go to its setting panel.

Pav Product Tabs module
Pav Product Tabs module is to display list of products in the website. The products are selected based on: Latest, Featured, Best Seller, Special, Most Viewed.
To configure the module, please go to: Extensions > Modules, find the Pav Product Tabs module then hit the "Edit" button to go to its setting panel.

Default Opencart Modules
These are default Opencart modules but it"s style has been customized to fit the theme design.
Category module
The module is to display list of category product in your OpenCart site. Its setting is so simple, just add layout, position that the module is displayed in and product image size.

To configure the module, please go to: Catalog > Categories and you can see the list of category product in your site.
Specials module
The module is to display list of special product in your OpenCart site. Its setting is so simple, just add layout, position that the module is displayed in and product image size.

To configure the module, please go to: Extensions > Modules, find the Specials module then hit the "Edit" button to go to its setting panel.
Banner module
The module is to display the banner of product in your OpenCart site. Its setting is so simple, just add layout, position that the module is displayed in and product image size.
To configure the module, please go to: Extensions > Modules, find the Banner module then hit the "Edit" button to go to its setting panel.>
Get Support
If you are unable to find your answer here in our documentation, please go to our forum and post up a new topic with all the details we need. Please be sure to include your site URL as well or send us an email.
Our support scope
Our support covers configuration, building site as demo, trouble using any features, and bug fixes. We don"t provide support for customizations or 3rd party extension.
Our support time
We try our best to monitor the email around the clock, however, this is not always possible due to different time zones. We will try to reply you as fast as we can.
Our working time is 8.00 AM - 5.30 PM, Monday to Friday (GMT+7). So if ask for help in the weekend, you may have to wait a little bit for support and please be patient.