W3 total cache кэширование динамичных файлов. Кэширование wordpress: установка и настройка плагина W3 Total Cache
Выводит заголовок записи подготовленный для использования в атрибутах html тега.
Функция должна использоваться внутри Цикла WordPress.
Функция идентична функции the_title() , стой лишь разницей, что эта функция "чистит" заголовок от HTML тегов и меняет HTML сущности (< , > , " , ") на их HTML эквиваленты. Например, знак < будет заменен на < . К заголовку применяются функции-фильтры: esc_attr() и strip_tags()
Также эта функция может принимать параметры в виде строки: "before=
&after=
"✈ 1 раз = 0.005307с = очень медленно | 50000 раз = 2.55с = быстро | PHP 7.1.2, WP 4.7.3
Хуков нет.
Возвращает
null/строку. null когда результат выводится на экран (echo=true). Заголовок когда результат возвращается (echo=true).
Использование
$args(массив/строка)Параметры в виде массива или строки. Можно передать следующие параметры:
- post
(число/объект)
ID или объект записи.
По умолчанию: текущая запись
before
(строка)
Текст/HTML код который нужно разместить перед заголовком.
По умолчанию: ""
after
(строка)
Текст/HTML код который нужно разместить после заголовка.
По умолчанию: ""
echo
(логический)
Вывести на экран (true) или возвратить для дальнейшей обработки (false).
По умолчанию: true
По умолчанию: ""
Примеры
#1. Пример использования функции в атрибуте title тега .
Так как в этом атрибуте не допускается использования html тегов кавычек и прочего, то мы не можем там использовать функцию the_title(). Взамен используем the_title_attribute() :
" title=" "Permalink to: ", "after" => "")); ?>">
Код the title attribute : wp-includes/post-template.php VER 5.1.1
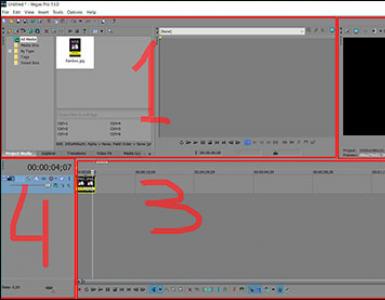
"", "after" => "", "echo" => true, "post" => get_post(),); $r = wp_parse_args($args, $defaults); $title = get_the_title($r["post"]); if (strlen($title) == 0) { return; } $title = $r["before"] . $title . $r["after"]; $title = esc_attr(strip_tags($title)); if ($r["echo"]) { echo $title; } else { return $title; } }Плагин W3 Total Cache делает Ваш сайт или блог реально быстрым, один из лучших плагинов для оптимизации WordPress. Солидные сайты mashable.com, smashingmagazine.com, yoast.com спокойно используют его в своих инструментах. Использование плагина W3 Total Cache на Вашем ресурсе повышает удобство работы вашим пользователям за счет повышения производительности сервера, кэширования каждого элемента, сокращения времени загрузки страниц, выдавая пользователю нужный ему материал буквально молниеносно.
Чтобы ощутить все прелести этого плагина, давайте для начала протестируем существующую ситуацию. Я выбрал один из последних сайтов, который я сделал, добавил приложение в Firefox YSlow Addon for Firefox которое покажет время загрузки сайта, у меня на данный момент оно составляет 8,5 сек – я был в шоке!
Изменим эту ситуацию!
- Перед установкой плагина Вы должны убедится, что любые другие плагины кэширования полностью удалены, в противном случае плагин W3 Total Cache при активации выдаст ошибку.
- Если все в порядке устанавливайте плагин (не в курсе как устанавливать плагины в WordPress? — читайте ).
- Официальная страничка плагина в каталоге WordPress.
- После того как Вы активируете плагин в панели управления появится новый пункт «Perfomance», нажимая на который мы попадаем на страницу настроек и конфигурации плагина W3 Total Cache.

Настройки и конфигурация W3 Total Cache
Плагин W3 Total Cache представляет собой очень мощный плагин, с колоссальным количеством опций и настроек. Каждая опция будет рассмотрена в деталях, для полного понимания всех существующих возможностей.
Вкладка General
Первым делом на странице настроек мы попадаем в раздел основных настроек General. Сразу же отключаем режим просмотра (см. картинку) нажатием на кнопку disable (то есть плагин будет работать в режиме реального времени, а не в режиме просмотра).

Следующая опция в этом списке Page Cache. Эта раздел работает так же как в плагине WP Super Cache – создается кэш для статических страниц, включая эту опцию Вы значительно уменьшите время загрузки, рекомендуется использовать диск Enchanced.

После блока Page Cache идет блок Minify – позволяет минимизировать файлы.css, .js, .html также записи, страницы и RSS. Опции обязательно отметьте как на скриншоте. Принцип действия мимнимизирования заключается в том, что удаляются бесполезные расстояния между тегами кода такое действие ускоряет время загрузки сайта на 10%.

Следующий блок опций Database Cache. Обязательно должен быть разрешен, так как CMS WordPRess полностью работает на базе данных и часто высокие нагрузки запросов к БД являются причиной жесткого замедления сайта + если у Вас большой трафик, то это вообще катастрофа. Включение опции может ускорить Ваш сайт в 100х раз.

Не расслабляемся и двигаемся к блоку Object Cache. Галочка в этом блоке увеличивает производительность динамических сайтов использующих API кэша объектов. Окончательные настройки должны выглядеть как на скриншоте:

После него идет блок настроек Browser Cache. Кэш браузера позволяет HTTP-сжатия, каждый раз когда пользователи посещает Ваш сайт, их браузер сохраняет копии сайта, так что к следующему посещению пользователю не нужно будет повторно загружать сайт целиком (что ускоряет время загрузки). Проблема в том, что каждый браузер сбрасывает кэш по своему расписанию, поэтому отметив этот чекбокс мы укажем браузеру как долго хранить информацию объекта.

Следующий этап это CDN (Content Delivery Network), к сожалению плагин поддерживает только платные варианты CDN: MaxCDN, NetDNA, Amazon S3, Rackspace Cloud и Amazon Cloud. Если Вы не знаете что такое CDN или не планируете его использовать, то советую сразу же галочку снять.

Далее идет блок Varnish – еще один замут с кэшированием типа CDN и блок Network Perfomance & Security powered by CloudFlare. Ими можем не пользоваться, убираем галочку с Enable. Эти блоки целесобразно использовать, если Ваш ресурс мега посещаем от 1000 и более посетителей — эти CDN, бесплатны, но если у Вас будет такое количество посетителей на сайте не лишним будет раскошелится на 40$ и подключить систему доставки контена (CDN) MaxCDN — очень хорошая и с поддержкой, об них я чуть попозже напишу отдельную статью.


Блок настроек Miscellaneous галочки ставим как на скриншоте ниже и если у Вас есть Page Speed Online API от Google, что можете его здесь ввести.

В блоке настроек Debug не советуют вообще что-то отмечать галочками, послушно поверим

И последний блок это импорт и экспорт настроек, можно сохранить настройки нажав кнопочку download на компьютер, можно и импортировать уже существующие настройки, в общем ничего сложного

Жестяк, с первой вкладкой основных настроек закончили, дальше проще и уже намного меньше, но еще чучуть есть настроечек.
Вкладка Page Cache
Наконец-то пройдя через настройки General, мы можем более детально настроить параметры кэша страниц. В блоке General мы все чекбоксы отмечаем галочками кроме страниц поиска и страницы ошибки 404 (их не нужно кэшировать) получаем такую картину:

В блоке Advanced мы можем выбрать время жизни странице в кэше, по умолчанию 3600 секунд, можете уменьшить (если Вы постоянно работаете над сайтом) или увеличить если изменения происходят редко. Далее можно задать не посылать кэш страницы Bot’у Google – не рекомендуется. Можем отметить страницы которые мы бы не хотели видеть в кэше. В настройках этого блока желательно придерживаться скриншота.


И последний блок настроек в этой вкладке Purge Policy – более определенный выбор страниц копии которых нужно создать в кэше.

Вкладка Minify
Более подробная минимизация (уменьшение размеров) файлов, в первом блоке настроек отмечаем галочкой перезаписывать структуру URL:


Следом настраиваем блок JS, можно добавить разные файлы скриптов для кэширования добавив их через кнопку «Add a script»


И в последнем блоке Advanced мы можем выбрать через какое время обновлять файлы шаблона

Вкладка Database Cache
Медленно, но уверено, главное до конца доползти. Блок настроек General как на скриншоте:

Блок настроек Advanced можете установить время жизни копии кэша

Вкладка Object Cache
Оставляем все здесь по умолчанию.
Вкладка Browser Cache
Здесь Вы можете указать какая информация будет заноситься в кэш браузера пользователя

Так и последним шагом будет нажатие кнопочки «Empty page cache» — нужно очистить кэш, после этого Вы увидите зеленое слово «Enable», которое говорит о том, что плагин успешно функционирует.

Заключение
Напоследок скажу, что дело мучительное… пол дня итого на все эти разборки, оно того стоило результаты можете посмотреть на скриншоте

Удачи! Если возникли какие-то вопросы, задавайте их в комментариях.
Часто возникает вопрос: «Какой плагин круче W3 Total Cache или WP Super Cache?». Важно понимать, что все нужно проверять самому, одно скажу точно: «если не использовать CDN в W3 Total Cache и в WP Super Cache, то скорость загрузки примерно одинакова». Выбор за Вами, можете подробнее прочитать о плагине WP Super Cache.
W3 Total Cache improves the SEO and user experience of your site by increasing website performance, reducing load times via features like content delivery network (CDN) integration and the latest best practices.
The only web host agnostic Web Performance Optimization (WPO) framework for WordPress trusted by millions of publishers, web developers, and web hosts worldwide for more than a decade.
ПРЕИМУЩЕСТВА
- Improvements in search engine result page rankings, especially for mobile-friendly websites and sites that use SSL
- At least 10x improvement in overall site performance (Grade A in WebPagetest or significant Google Page Speed improvements) when fully configured
- Improved conversion rates and «site performance » which affect your site’s rank on Google.com
- «Instant» repeat page views: browser caching
- Optimized progressive render: pages start rendering quickly and can be interacted with more quickly
- Reduced page load time: increased visitor time on site; visitors view more pages
- Improved web server performance; sustain high traffic periods
- Up to 80% bandwidth savings via minify and HTTP compression of HTML, CSS, JavaScript and feeds
ОСНОВНЫЕ ВОЗМОЖНОСТИ
- Compatible with shared hosting, virtual private / dedicated servers and dedicated servers / clusters
- Transparent content delivery network (CDN) management with Media Library, theme files and WordPress itself
- Mobile support: respective caching of pages by referrer or groups of user agents including theme switching for groups of referrers or user agents
- Accelerated Mobile Pages (AMP) support
- Secure Socket Layer (SSL) support
- Caching of (minified and compressed) pages and posts in memory or on disk or on (FSD) CDN (by user agent group)
- Caching of (minified and compressed) CSS and JavaScript in memory, on disk or on CDN
- Caching of feeds (site, categories, tags, comments, search results) in memory or on disk or on CDN
- Caching of search results pages (i.e. URIs with query string variables) in memory or on disk
- Caching of database objects in memory or on disk
- Caching of objects in memory or on disk
- Caching of fragments in memory or on disk
- Minification of posts and pages and feeds
- Minification of inline, embedded or 3rd party JavaScript (with automated updates)
- Minification of inline, embedded or 3rd party CSS (with automated updates)
- Browser caching using cache-control, future expire headers and entity tags (ETag) with «cache-busting»
- JavaScript grouping by template (home page, post page etc) with embed location control
- Non-blocking JavaScript embedding
- Import post attachments directly into the Media Library (and CDN)
- WP-CLI support for cache purging, query string updating and more
- Various security features
- Caching statistics for performance insights
- Extension framework for customization or extensibility e.g. New Relic, Cloudflare, WPML and more
- Reverse proxy integration via Nginx or Varnish
Improve the user experience for your readers without having to change WordPress, your theme, your plugins or how you produce your content.
What users have to say:
Who do I thank for all of this?
It’s quite difficult to recall all of the innovators that have shared their thoughts, code and experiences in the blogosphere over the years, but here are some names to get you started:
- George Schlossnagle
- Daniel Cowgill
Please reach out to all of these people and support their projects if you’re so inclined.
Установка
- Deactivate and uninstall any other caching plugin you may be using. Pay special attention if you have customized the rewrite rules for fancy permalinks, have previously installed a caching plugin or have any browser caching rules as W3TC will automate management of all best practices. Also make sure wp-content/ and wp-content/uploads/ (temporarily) have 777 permissions before proceeding, e.g. in the terminal: # chmod 777 /var/www/vhosts/domain.com/httpdocs/wp-content/ using your web hosting control panel or your FTP / SSH account.
- Login as an administrator to your WordPress Admin account. Using the «Add New» menu option under the «Plugins» section of the navigation, you can either search for: w3 total cache or if you’ve downloaded the plugin already, click the «Upload» link, find the .zip file you download and then click «Install Now». Or you can unzip and FTP upload the plugin to your plugins directory (wp-content/plugins/). In either case, when done wp-content/plugins/w3-total-cache/ should exist.
- Locate and activate the plugin on the «Plugins» page. Page caching will automatically be running in basic mode. Set the permissions of wp-content and wp-content/uploads back to 755, e.g. in the terminal: # chmod 755 /var/www/vhosts/domain.com/httpdocs/wp-content/ .
- Now click the «Settings» link to proceed to the «General Settings» tab; in most cases, «disk enhanced» mode for page cache is a «good» starting point.
- The «Compatibility mode» option found in the advanced section of the «Page Cache Settings» tab will enable functionality that optimizes the interoperablity of caching with WordPress, is disabled by default, but highly recommended. Years of testing in hundreds of thousands of installations have helped us learn how to make caching behave well with WordPress. The tradeoff is that disk enhanced page cache performance under load tests will be decreased by ~20% at scale.
- Recommended: On the «Minify Settings» tab, all of the recommended settings are preset. If auto mode causes issues with your web site’s layout, switch to manual mode and use the help button to simplify discovery of your CSS and JS files and groups. Pay close attention to the method and location of your JS group embeddings. See the plugin’s FAQ for more information on usage.
- Recommended: On the «Browser Cache» tab, HTTP compression is enabled by default. Make sure to enable other options to suit your goals.
- Recommended: If you already have a content delivery network (CDN) provider, proceed to the «Content Delivery Network» tab and populate the fields and set your preferences. If you do not use the Media Library, you will need to import your images etc into the default locations. Use the Media Library Import Tool on the «Content Delivery Network» tab to perform this task. If you do not have a CDN provider, you can still improve your site’s performance using the «Self-hosted» method. On your own server, create a subdomain and matching DNS Zone record; e.g. static.domain.com and configure FTP options on the «Content Delivery Network» tab accordingly. Be sure to FTP upload the appropriate files, using the available upload buttons.
- Optional: On the «Database Cache» tab, the recommended settings are preset. If using a shared hosting account use the «disk» method with caution, the response time of the disk may not be fast enough, so this option is disabled by default. Try object caching instead for shared hosting.
- Optional: On the «Object Cache» tab, all of the recommended settings are preset. If using a shared hosting account use the «disk» method with caution, the response time of the disk may not be fast enough, so this option is disabled by default. Test this option with and without database cache to ensure that it provides a performance increase.
- Optional: On the «User Agent Groups» tab, specify any user agents, like mobile phones if a mobile theme is used.
Часто задаваемые вопросы
Why does speed matter?Search engines like Google, measure and factor in the speed of web sites in their ranking algorithm. When they recommend a site they want to make sure users find what they’re looking for quickly. So in effect you and Google should have the same objective.
Speed is among the most significant success factors web sites face. In fact, your site’s speed directly affects your income (revenue) — it’s a fact. Some high traffic sites conducted research and uncovered the following:
- Google.com: +500 ms (speed decrease) -> -20% traffic loss
- Yahoo.com: +400 ms (speed decrease) -> -5-9% full-page traffic loss (visitor left before the page finished loading)
- Amazon.com: +100 ms (speed decrease) -> -1% sales loss
A thousandth of a second is not a long time, yet the impact is quite significant. Even if you’re not a large company (or just hope to become one), a loss is still a loss. However, there is a solution to this problem, take advantage.
Many of the other consequences of poor performance were discovered more than a decade ago:
- Lower perceived credibility (Fogg et al. 2001)
- Lower perceived quality (Bouch, Kuchinsky, and Bhatti 2000)
- Increased user frustration (Ceaparu et al. 2004)
- Increased blood pressure (Scheirer et al. 2002)
- Reduced flow rates (Novak, Hoffman, and Yung 200)
- Reduced conversion rates (Akamai 2007)
- Increased exit rates (Nielsen 2000)
- Are perceived as less interesting (Ramsay, Barbesi, and Preece 1998)
- Are perceived as less attractive (Skadberg and Kimmel 2004)
Yes, built from the ground up with scale and current hosting paradigms in mind.
What is the purpose of the «Media Library Import» tool and how do I use it?
The media library import tool is for old or «messy» WordPress installations that have attachments (images etc in posts or pages) scattered about the web server or «hot linked» to 3rd party sites instead of properly using the media library.
The tool will scan your posts and pages for the cases above and copy them to your media library, update your posts to use the link addresses and produce a .htaccess file containing the list of of permanent redirects, so search engines can find the files in their new location.
You should backup your database before performing this operation.
How do I find the JS and CSS to optimize (minify) them with this plugin?
Use the «Help» button available on the Minify settings tab. Once open, the tool will look for and populate the CSS and JS files used in each template of the site for the active theme. To then add a file to the minify settings, click the checkbox next to that file. The embed location of JS files can also be specified to improve page render performance. Minify settings for all installed themes can be managed from the tool as well by selecting the theme from the drop down menu. Once done configuring minify settings, click the apply and close button, then save settings in the Minify settings tab.
I don’t understand what a CDN has to do with caching, that’s completely different, no?
Technically no, a CDN is a high performance cache that stores static assets (your theme files, media library etc) in various locations throughout the world in order to provide low latency access to them by readers in those regions.
How do I use an Origin Pull (Mirror) CDN?
Login to your CDN providers control panel or account management area. Following any set up steps they provide, create a new «pull zone» or «bucket» for your site’s domain name. If there’s a set up wizard or any troubleshooting tips your provider offers, be sure to review them. In the CDN tab of the plugin, enter the hostname your CDN provider provided in the «replace site’s hostname with» field. You should always do a quick check by opening a test file from the CDN hostname, e.g. http://cdn.domain.com/favicon.ico. Troubleshoot with your CDN provider until this test is successful.
Now go to the General tab and click the checkbox and save the settings to enable CDN functionality and empty the cache for the changes to take effect.
How do I configure Amazon Simple Storage Service (Amazon S3) or Amazon CloudFront as my CDN?
Участники и разработчики
«W3 Total Cache» - проект с открытым исходным кодом. В развитие плагина внесли свой вклад следующие участники:
УчастникиЖурнал изменений
0.9.7.2
- Fixed fatal error during media file upload with CDN module active
- Fixed removal of empty values, JSON encoded string in attribute, trailing quote at end of tag, and the handling of anchors in HTML minify
- Fixed undefined index warning
- Fixed fatal error when purging CDN using full site delivery
0.9.7.1
- Fixed undefined variable notice
- Fixed «No such file or directory» warning
- Fixed writing to PHP error log rather than WordPress debug log
- Fixed default referrer policy should be «no-referrer-when-downgrade»
- Fixed php_flag error related to browser cache, using ini_set instead
- Fixed CloudFlare IPv6 check undefined offset
- Fixed Undefined constant WP_ROOT
- Fixed frame-ancestors being overwritten by frame-src
- Fixed missing semicolon in nginx configuration
- Fixed HTTP/2 URLs handling for browser cache and CDN modules
- Fixed display of CDN debug information
- Fixed CSS Minification with Google Fonts when included via «Include external files/libraries» and non-latin character-sets are loaded
- Fixed media query string not updating when all caches were purged
- Fixed double slash with ABSPATH if file exists
- Fixed setting max-age and expires header simultaneously
- Fixed SASL detection for PECL Memcached
- Fixed handling of manually entered objects to be purged on CDN
- Fixed query string handling in Nginx
- Improved error handling with Cloudfront
- Improved page cache logging
- Improved multi-tenant support for memory-based caching engines
- Improved CSS minification
- Improved purge behavior for changed media objects when using CDN
- Improved compatibility with sitemap plugins
- Added support for Memcached for Nginx
- Added support for caching webm files
- Added Brotli HTTP compression support
- Added StackPath full site delivery support
- Added wc_session to the list of ignored query stems for improved WooCommerce compatibility
0.9.7
- Fixed minified files not being hosted by CDN when enabled if «host minified files» is disabled
- Fixed warning thrown when purge all was selected (via nigrosimone)
- Fixed undefined offset error in fragment cache
- Fixed MaxCDN test button failure when debug mode is enabled
- Fixed purging of feeds when cache feeds option is enabeld
- Improved handling of errors when full site delivery isn’t set
- Improved nginx.conf to support xml caching
- Improved nginx.conf to support HSTS for static files
- Improved minify’s handling of query strings
- Improved database caching, frequent wp_options no longer flush posts or comments data
- Improved Limelight Networks CDN integration
- Improved FAQ, they’re now hosted in the GitHub public repository
- Improved handling for /
- Added flushing of AMP pages
0.9.5.2
- Fixed security issue by protecting configuration data by adding .php to relevant files
- Fixed security issue with the creation of dot folders that could be abused
- Fixed handling HTTP compression for uncached pages
- Fixed handling of .svgz files
- Added expiration headers to webP images
- Added support for Microsoft Azure’s latest API
- Added ability to cache WP Admin. Recommended setting, is off. (Improved WP Admin performance with object caching enabled)
- Added HTTP/2 Push support for minified files
- Added option management support for wp-cli
- Improved handling of uncompressed minified files
- Improved handling of purging of modified pages / posts
- Improved compatibility with Rackspace Cloud Files
- Improved initial CDN configuration reliability
- Improved reliability of object caching
- Improved PHP 7.0 compatibility
- Improved PHP 4.3 compatibility
- Improved HTTP/2 support
- Improved CSS embed handling
- Improved reliability of object cache, transients now fallback to database
- Improved handling of cached http compressed objects
0.9.5.1
- Fixed missing namespace, which caused issues with other implementations of Google APIs
- Fixed handling Cloudflare zone list being incomplete for users with many zones
- Added extension to support Accelerated Mobile Pages (AMP)
- Added notification for users that are still using PHP 5.2 (end of life in 2011)
- Improved default settings
- Improved compatibility with Yoast SEO sitemap caching
- Improved compatability with Jetpack
- Improved directory handling on IIS
- Improved backwards compatibility for 3rd party implementations against legacy W3TC functions
0.9.5
- Fixed XSS vulnerability
- Fixed issues with dismissing overlays
- Fixed handling of tilde in URLs
- Fixed issue with HTTP compression header when using mfunc calls
- Fixed cache ID issue with minify in network mode
- Fixed rare issue of caching empty document when some PHP errors occur in themes or plugins
- Fixed caching of query strings
- Added support for APCu Opcode Cache
- Added support for Redis
- Added support for Google Drive
- Added support for Amazon S3-compatible stroage services
- Added support for PECL memcached
- Added support for srcset elements
- Added support for Rackspace CDN Origin Pull
- Added support for minification of external fonts
- Added support for WOFF2 font format
- Added support for FTPS (FTP-SSL, S-FTP)
- Added YUI Compressor’s PHP Port of the CSS minifier
- Added Narcissus’ JS minifier
- Added purge of parent page when attachments are added or updated
- Added Highwinds CDN provider
- Added «Validate Timestamps» option for compatible opcode caches functions like apc.stat are enabled
- Added Full Site Delivery for Pro subscribers
- Added HTTP Strict Transport Security (HSTS) support
- Added a sample extension for developers to reference
- Added Rackspace Cloud Files Multi-Region Support
- Added more support for exclusions to database cache
- Added more optionality to minifiers
- Added WPML Performance Extension
- Added use of namespace which creates mininum dependency on version PHP 5.3
- Improved PHP 5.6 compatibility
- Improved PHP 7 compatibility
- Improved performance menu in admin bar, including purging of specific cache engines and more
- Improved SSL interoperability
- Improved reliablity of test buttons
- Improved nomenclature of caching files for higher cache hit rates
- Improved nginx compatibility
- Improved WP CLI support
- Improved Cloudflare compatibility (now using latest APIs), Cloudflare must be re-authorized
- Improved AWS API compatibility (now using latest APIs)
- Improved Rackspace Cloud Files compatibility (now using latest APIs)
- Improved page cache purge for extensions like cloudflare and other reverse proxy use cases
- Improved extension framework functionality
- Improved compatibility of headers like ETag and content encoding
- Improved template fragment caching
- Improved notifications, warnings and errors
- Improved moble user agents detection
- Improved security with nonces and form elements
- Improved security throughout the codebase
- Improved detail of debug messages
- Improved Amazon SNS security (validation)
- Improved minify’s ability to match script tags without type attribute
0.9.4
- Fixed undefined w3tc_button_link
- Fixed support and other form submissions
- Fixed extension enabled key error
- Fixed Test CDN errors
- Fixed trailing slashes in custom wp content path and Minify
- Fixed WP_PLUGIN_DIR not being available when object-cache.php is loaded and W3TC constant not set
- Fixed Minify Auto and restructuring of JS code placement on page
- Fixed remove / replace drop in file on plugins page
- Fixed false positive check for legacy code
- Fixed deprecated wpdb escape
- Fixed Fragment Caching and APC anomalies
- Fixed cached configs causing 500 error on interrupted file writes
- Fixed readfile errors on servers with the functionality disabled
- Fixed false positives for license key verification
- Fixed debug information not printed on cached pages
- Fixed backwards compatibility and flushing and added doing it wrong notification
- Fixed «Prevent caching of objects after settings change»
- Fixed «Use late init» being shown as enabled with Disc:Enhanced
- Fixed missing param in APC cache method declaration
- Fixed user roles property not begin an array
- Fixed adding empty Vary header
- Fixed notice on failed upgrade licencing check
- Fixed Database Cache description text
- Fixed duplicate bb10 agents
- Fixed settings link in Minify Auto notification
- Fixed notice with undefined constant
- Fixed nginx configuration and Referrer, User Groups setting
- Fixed Genesis settings and Suhosin field name limit error
- Fixed Genesis and Fragment Caching (caching categories etc)
- Fixed CDN being enabled when creating NetDNA / MaxCDN pull zone
- Fixed NewRelic related notice in compatibility popup
- Fixed trailing slash issue in filename to url conversion
- Fixed issue with wp in subdirectory and relative minimal manual urls
- Fixed issue with widget styling
- Fixed issue with Purge All button action
- Fixed issue with exporting of settings
- Fixed issue with plugin interferring with preview theme
- Fixed issue with malformed config files
- Added caching of list of posts pages (tags, categories etc) to Genesis extension a long with flush it checkbox
- Added typecasting on expiration time in object cache drop-in
- Added capability check for save options
- Added FeedBurner extension
- Added woff support to Browser Cache
- Added new CloudFlare IPs
- Added support for WordPress defined charset and collate in CDN queue table creation
- Added WordPress SEO by Yoast extension
- Added *.less to CDN theme uploads and MIME
- Added default settings for MaxCDN Pull Zone creation
- Added call to change MaxCDN canonical header setting to match plugin setting
- Added one button default pull zone creation to MaxCDN without refresh
- Added MaxCDN authorization validation
- Added whitelist IPs notification for MaxCDN
- Added support for use of existing zones without refresh
- Added new mime types
- Added support for separate domains for frontend and admin backend
- Added CloudFlare as an extension
- Added nofollow to blogroll links
- Added DEV mode support to PRO version
- Added EDGE MODE functionality
- Improved wrapper functions in plugins.php for plugin / theme authors
- Improved reliability of NetDNA / MaxCDN API calls by using WP HTTP and not cURL
- Improved Fragment Caching debug information
- Improved preview mode, removed query string requirement
- Improved FAQ structure
- Improved empty minify/pgcache cache notification when using CDN
- Improved default settings for MaxCDN zone creation
- Improved CDN queue performance
- Improved blogmap url sanitation
- Improved MaxCDN automatic zone creation process
- Improved license key saving and Pro mode activation on Pro license purchases
- Updated EDGE MODE: Full site mirroring support for MaxCDN
- Updated translations
Продолжение настройки плагина w3 total cache. W3 total cache — это лучший плагин кэширования wordpress который с помощью WordPress кэширования значительно ускорить ваш сайт.
Первая часть настройки W3 total cache плагина
После установки вы увидите новую надпись в верхней части вашей панели администратора.
Page Cache — кэш wordpress для страницы
Здесь вы можете включить кэширование WordPress для страницы
Если вы используете SSL — то поставте галочку возле Cache SSL (https) . Так же включите кэширование WordPress для главной страницы и категорий, тегов, комментариев. Это значительно ускорит ваш WordPress сайт.
Update interval — этот параметр отвечает за время, через которое создаются новые версии кешированых страниц. Так как контент сайта может меняться, новые кешированые страницы нужно пересоздавать, чтобы контент был актуальным.

Don’t cache pages for logged in users — Не кешировать страницы для залогиненых пользователей. Это опция всегда должна быть включена (с галочкой). Так как они должны видеть актуальный контент на сайта (например администратор, который выполняет правки в статье при отключенной опции не будет видеть новую версию статьи, а будет видеть ту, которая закеширована).

Purge Policy — wordpress кэширование при обновлении страницы
Плагин w3 total cache позволяет определить, какие для каких страниц необходимо создавать новую кешированную версию при обновлении самой статьи/страницы.
Вы можете оставить настройки по умолчанию.

Minify: General — кэш wordpress для файлов
Настройки для минификации файлов (html, js и сss).
Rewrite URL structure — должно быть включено, если что-то не работает, то попробуйте убрать.
Disable minify for logged in users — обычно для залогиненых пользователей и гостей нужны одинаковые файлы, поэтому можно отключить данную опцию.
Minify error notification — показ ошибок. Можно установить Admin notification для того, чтобы были видны ошибки в панели администратора
Minify: HTML & XML
Важная часть настроек. Позволяет указать настройки для минификации HTML и XML. На скриншоте снизу включена минификация (enable). Так же установлена минификация для css и js кода, который встречается в html.

В этой статье описана настройка W3 Total Cache плагина. Это плагин WordPress для кэширования сайта. По мнению многих это лучший плагин кэширования wordpress. Кэш wordpress позволяет ускорить загрузку вашего вордпресс сайта, поэтому этот плагин будет полезен тем у кого медленный сайт.
W3 Total Cache — бесплатный WordPress плагин для кэширования, поэтому для его установки перейдите во вкладку Плагины > добавить новый и в строке поиска впишите W3 Total Cache. Далее установите и активируйте плагин. Настройка W3 Total Cache происходит в несколько этапов.
Настройка w3 total cache
Нажмите на Performance и вы попадете в меню плагина.
Вкладка Dashboard служит для тестирования совместимости между сервером и плагином кэширования WordPress и мониторинга работы.
Compatibility check: тестирует сервер и определяет, какие функции доступны.
Empty all caches: Удаление всего кеша
Empty only the memcached cache: Удаляет только memcached кеш.
Empty only the opcode cache: Удаляет только opcode кеш.
Empty only the disk cache(s): Удаляет все, что кешировано на диске.
Compatibility Test — тест кэша wordpress
Дает представление о том, какие функции поддерживает ваш сервер. Если вы только установили W3 Total Cache плагин, запустите тест для того, чтобы знать, что вы можете использовать.
General Settings: General — общие настройки w3 total cache

Просто нажать Toggle all caching types on or off (at once)
и сохранить не получится — поступи много сообщений об ошибках.
Preview Mode
— вы можете использовать режим превью для того, чтобы оценить внесенные изменения перед их утверждением.
General Settings: Page Cache — кэш страницы w3 total cache
Следующая секция — это Page Cache. Это одна из самых полезных функций. Просто включив кеш для сайта можно добиться существенного прироста скорости работы.
W3 Total Cache
имеет несколько вариантов для кэширования в Page Cache Method.

General Settings: Minify
Минификация — это процесс сжатия HTML, JavaScript и CSS файлов путем удаления ненужных пробелов. При этом функционал файлов не изменяется. Вы можете выбрать ручной или авто режим для минификации файлов.
Попробуйте выбрать авто и посмотрите, правильно ли работает ваш сайт. Если появились ошибки, то попробуйте ручной режим.
General Settings: Database Cache — w3 total cache кэш базы данных
Эти настройки используются плагином w3 total cache для кэша базы данных. Если у вас виртуальный хостинг, то лучшие оставить эту опцию отключенной. Так как она может замедлить ваш сайт.

General Settings: Object Cache — объектное кэширование wordpress
Объектное кэширование WordPress встроено в ядро WordPress. Может быть полезно, если у вас очень динамичный проект (например с использованием BuddyPress). В ином случае эта опция может замедлить работу вашего сайта.

General Settings: Browser Cache — w3 total cache кэш для браузера
Кэширования браузера — кеширует данные вебсайта в браузере пользователя. При повторном посещении пользователем вашего сайта будет использована версия из браузера.

General Settings: CDN — кэширование WordPress CDN
Если вы используете CDN (Content Delivery Network), вы можете включить данную опцию.

General Settings: Debug — ошибки кэширования w3 total cache
Используется для отслеживания ошибок. для простого пользователя использовать это не нужно.