Простая форма регистрации html. HTML-формы
Here is an example of html login page code. In this example, we have displayed one text field, Password, Reset button and Login button. We have used Reset button that resets all fields to blank.We have used JavaScript validation in Login page. We have set username and password value.
Here is an example of html login page code. In this example, we have displayed one text field, Password, Reset button and Login button. We have used Reset button that resets all fields to blank.We have used JavaScript validation in Login page. We have set username and password value.Here is an example of html login page code. In this example, we have displayed one text field, Password, Reset button and Login button. We have used Reset button that resets all fields to blank. We have used JavaScript validation in Login page. We have set username and password value. If a person enter a wrong username or password or both, an error message with "Error: Incorrect Username or Password" will be displayed. Till the person enters the correct username and password, it will not Login.
Once you enter the correct Username and Password, you will be redirected to another page.
Login page is used in most of the dynamic website to validate user based on their credentials. For making login page for websites HTML form and HTML elements are used. Text field is used to accept username and password text field is used to accept password from user.
The submit button is used for submitting data to server for validation. Its good to validate user input in the browser using JavaScript. In this tutorial we are creating a HTML Login page code and validating user input with JavaScript. In modern web application server-side validation is also very important it is done on server side with the program running on the server.
Here is video tutorial:
But in this tutorial you will learn to create a login page in HTML and validate user input with JavaScript. View demo of HTML Login page .
Here is the screen shot of the the login page we are making:
This login page displays Username, Password text fields and then buttons for reset and Login. Once user enters the data and clicks on the Login button, JavaScript is used to validate the form and error message is displayed if validation fails.
HTML Login page with JavaScript Validation
Login Page
| HTML Login Page | |
| Username: | |
| Password: | |
В формате данного урока создадим форму авторизации на CSS , покажу, как подключать шрифтовые иконки, каким образом задавать прозрачность у элементов, задействуем в форме анимированные эффекты при наведение.
Каркас формы в HTMLПервым создаем каркас формы. Открываем заготовку html и пропишем следующий код между тегами.
Создаем блок, который будет являться контейнер для формы. Присвоим ему класс .container , в нем размещаем форму с input Первый input для ввода логина type="text" name="username" placeholder="Введите логин" , второй input type="password" name="password" placeholder="Введите пароль" принимает пароль и за ним кнопка submit . Ниже размещаем надпись для восстановления пароля, сделаем ее простой ссылкой.
Восстановить пароль
Описываем в CSS элементы формыЗатем оформим данные элементы формы. Создадим дополнительную директорию CSS в которой будем размещать файлы стилей. В ней создаем файл style.css и подключаем его к нашей страничке.
Я предлагаю на задний фон поставить изображение, для этого создадим дополнительную директорию img
, и поместим в нее свое изображение. Подключаем картинку в style.css
для body
. Прописываем путь до картинки, выходим с текущей директории, заходим в папочку img
, и далее название картинки.
Body{ background-image: url("../img/bg.png"); }
A{ color: #fff; } a:hover{ text-decoration: none; }
Предадим стили контейнеру с формой .container
. Зададим ширину в 450 пик., и временно установим высоту в 500 пик. Зададим цвет #182134
, и отцентрируем ее посередине экрана margin: 250px auto 0 auto;
. Текст в нутрии блока размещаем по центру, сверху сделаем отступ в 20 пик.
Container{ width:450px; height: 500px; background-color: #182134; margin: 250px auto 0 auto; text-align: center; }
Оформим затем input для ввода логина и пароля. Что бы не затронуть кнопку, отберем их по атрибутам text и password , указываем ширину в 300 пик. , высоту в 50 пик. Текст увеличиваем на 18 пик., сделаем отступы между ними в 25 пик., закруглим углы border-radius: 4px; , текст сдвинем на 10 пик. влево.
Input,input{ width: 300px; height:50px; font-size: 18px; margin-bottom: 25px; border-radius: 4px; padding-left: 10px; }
Затем отцентруем inpyt
, для этого обернем их в дополнительный блок и присвоим класс .dws-input
. Сделаем перенос строки после кнопки, и вверху перед кнопкой вставим картинку с нашим логотипом. Для этого скопируем ее в папку img
, и пропишем к ней путь img src="img/men.png"
.

Восстановить пароль
Далее опишем ее стили. Картинке присвоим ширину и высоту по 120 пик. , затем подымем ее чуть выше формы margin: -60px 0 30px 0; , делаем об водку в 5 пик. border: 5px solid #1a394f; , закругляем углы в 50%.
Container img{ width:120px; height:120px; margin: -60px 0 30px 0; border: 5px solid #1a394f; border-radius: 50%; }
Теперь опишем стили кнопки. Присвоим ей класс .dws-submit , и назначаем ей стили. Назначаем отступы, увеличим текст на 15 пик., делаем его белым, а фон кнопки синим, убираем об водку и сделаем в низу плашку, а также курсор Pointer .
Dws-submit { padding: 13px 30px; margin: 5px 0 20px 0; font-size: 15px; color: #fff; background-color: #2ca8c6; border: none; border-bottom: 4px solid #6ee9fd; cursor: pointer; }
Чтобы отцентровать инпуты и кнопку, поместим их отдельно каждый в свой блок. Опишем стили кнопке при наведении. Делаем плавный переход, цвет кнопки меняем на белый, а в тоже время шрифт будет меняться на темный.
Dws-submit:hover{ transition: all 0.5s; background: #fff; color: #2c536c; }
Сделаем, сверху нашей формы синею плашку, box-shadow: 0 -5px 0 #3adbfd; , и добавим ее к картинке box-shadow: 0 -5px 0 #3adbfd; . Сделаем фон формы немного прозрачнее, для этого пропишем этот цвет в формате RGBA .
Я пользуюсь сервисом w3schools.com , спускаемся вниз до Color Picker , в форму введем наш цвет и преобразуем его в RGB . Копируем, вставляем в стиль контейнера.
Container{ width:450px; height: 500px; background-color: rgba(24, 33, 52, 0.7); margin: 250px auto 0 auto; text-align: center; box-shadow: 0 -5px 0 #3adbfd; } .container img{ width:120px; height:120px; margin: -60px 0 30px 0; border: 5px solid #1a394f; border-radius: 50%; box-shadow: 0 -5px 0 #3adbfd; }
Для эффекта, закруглим нижние углы, для этого пропишем border-radius: 0 0 10px 10px;
.
Добавим иконки в виде шрифтов, переходим на сервис fontawesome.io и скачиваем их к себе на компьютер. Распакуем архив, копируем папку fonts, в которой находятся шрифты, и копируем файл стилей в директории css. Затем подключаем стили к страничке.
Отберем иконки для наших инпутов, для этого переходим на страничку Icons , первый подключим стиль для ввода логина, используем user , копируем его код f007 , и описываем его в стилях при помощи псевдоэлемента.
Подключаем шрифты font-family: "FontAwesome"; ,затем саму иконку, позиционируем ее абсолютно поля, увеличим ее на 30 пик, отцентруем и изменим цвет.
Dws-input::before{ font-family: "FontAwesome"; content: "\f007"; position: absolute; font-size: 30px; padding: 10px 0 0 7px; color: #2c536c; }
Немного подвинем текст в input - padding-left: 40px; .
Отберем вторую иконку с названием lock , копируем ее код f023 , и описываем ее стили.
Для этого отбираем второй элемент .dws-input:nth-child(2)::before{}
, и прописываем картинку content: "\f023
";.
Dws-input::before{ font-family: "FontAwesome"; content: "\f007"; position: absolute; font-size: 30px; padding: 10px 0 0 7px; color: #2c536c; } .dws-input:nth-child(2)::before{ content: "\f023"; }
Dws-input:hover::before{ color: #319ebc; transition: all 0.3s; }
А также, стили наведение для инпутов.
Dws-input input:hover{ box-shadow: 0 0 6px 3px rgba(58, 219, 253, 0.35); }
Для удобства обернем их в блок с классом .social
и опишем их стили. Изменим их цвет на белый, увеличим на 20 пик., сделаем шириной в 20 пик., и дадим отступы.
Dws-social i{ color: #fff; font-size: 20px; width: 20px; padding: 10px; }
Затем опишем стили при наведении. Сделаем белый блок, фон иконки изменим на темный, закруглим углы и при наведение отобразим курсор.
Social i:hover{ background-color: #fff; color: #1a394f; border-radius: 5px; cursor: pointer; }
Уберем высоту блока формы, которую задавали в самом начале, а в место ее добавим нижний отступ padding-bottom: 20px; .
В принцыпе и все, получилась довольно симпатичная форма, которую можно подключить на сайт и использовать для авторизации.
Пробуйте сделать на примере данного урока что нибудь свое оригинальное, тренируйтесь, и не забывайте делится данным материалом.
HTML5 дает много возможностей и улучшений для веб-форм, появились новые атрибуты и типы полей, которые были введены, главным образом, чтобы сделать жизнь веб-разработчикам проще, а работу с формами более удобной для веб-пользователей. Сегодня мы будем делать страницу авторизации при помощи html5. Если вы не знакомы с новыми «полезностями» для форм, этот урок вам поможет.
Окончательный результат:
Давайте создадим следующую разметку
Section class="loginform cf">
- Password
Если вы работали с HTML-формами раньше, этот код вам покажется знакомым. Но есть также и некоторые особенности. Поля имеют заполнители и некоторые атрибуты, которые являются новыми.
Заполнители полей (placeholder)Атрибут placeholder позволяет включить текст по умолчанию в поле, который исчезнет, когда элемент получит фокус или когда поле заполнено. Раньше мы делали это при помощи JavaScript, но теперь все стало намного проще благодаря новым атрибутам.

Атрибут required не позволяет оставлять пустые поля до отправки формы. Если пользователь не заполнил поле, появляется следующая ошибка.

Новый селектор также включен в CSS3 (:required). Вот пример:
Input { border : 1px solid red ; }
Типы полейНаше первое поле имеет тип email (типы инпутов — это еще одно нововведение HTML5). Если пользователь не заполнит поле с адресом электронной почты, появится следующее уведомление;

Использование такого инпута также удобно тем, что пользователям мобильных устройств (iPhone или Android) будет удобнее заполнять поле с выделенным «@» .
Новые возможности, предлагаемые для форм HTML5, являются мощными и простыми в реализации, но они не везде поддерживаются, например;
Атрибут placeholder поддерживают только современные браузеры - Firefox 3.7+, Safari 4+, Chrome 4+ and Opera 11+ . Если вы хотите это исправить, используйте этот костыль в сочетании с Modernizr .
То же с атрибутом required
. Уведомление об ошибке не могут быть персонифицированы, но ошибка будет оставаться: «Пожалуйста, заполните поля» вместо
«Пожалуйста, введите имя», этот атрибут также поддерживается только в нормальных браузерах.
Label { display : block ; color : #999 ; } .cf :before , .cf :after { content : "" ; display : table; } .cf :after { clear : both ; } .cf { *zoom: 1 ; } :focus { outline : 0 ; }
Все поля, кроме поля для «submit», будут иметь следующие стили:
Loginform input:not ([ type=submit] ) { padding : 5px ; margin-right : 10px ; border : 1px solid rgba(0 , 0 , 0 , 0 .3 ) ; border-radius: 3px ; box-shadow: inset 0px 1px 3px 0px rgba(0 , 0 , 0 , 0 .1 ) , 0px 1px 0px 0px rgba(250 , 250 , 250 , 0 .5 ) ; }
А вот стили для кнопки для отправки формы.
Loginform input[ type=submit] { border : 1px solid rgba(0 , 0 , 0 , 0 .3 ) ; background : #64c8ef ; /* Old browsers */ background : -moz-linear-gradient(top , #64c8ef 0 % , #00a2e2 100 % ) ; /* FF3.6+ */ background : -webkit-gradient(linear, left top , left bottombottom, color-stop(0 % ,#64c8ef ) , color-stop(100 % ,#00a2e2 ) ) ; /* Chrome,Safari4+ */ background : -webkit-linear-gradient(top , #64c8ef 0 % ,#00a2e2 100 % ) ; /* Chrome10+,Safari5.1+ */ background : -o-linear-gradient(top , #64c8ef 0 % ,#00a2e2 100 % ) ; /* Opera 11.10+ */ background : -ms-linear-gradient(top , #64c8ef 0 % ,#00a2e2 100 % ) ; /* IE10+ */ background : linear-gradient(to bottombottom, #64c8ef 0 % ,#00a2e2 100 % ) ; /* W3C */ filter: progid:DXImageTransform .Microsoft .gradient ( startColorstr="#64c8ef" , endColorstr="#00a2e2" ,GradientType=0 ) ; /* IE6-9 */ color : #fff ; padding : 5px 15px ; margin-right : 0 ; margin-top : 15px ; border-radius: 3px ; text-shadow : 1px 1px 0px rgba(0 , 0 , 0 , 0 .3 ) ; }
Вот и все! Надеемся, этот урок вам пригодился.
Как вы уже знаете, веб-клиент имеет возможность передавать веб-серверу различную информацию при помощи GET и POST-запросов. HTML-формы - это основной инструмент для создания таких запросов. По сути, HTML-форма представляет собой поле или поля для ввода информации на веб-странице. Наглядным примером HTML-формы служит форма ввода логина и пароля для авторизации на сайте.
HTML-форма описывается с помощью парного тега form . Этот тег имеет два важнейших атрибута: method и action . В атрибуте method задается тип HTTP-запроса (get или post), в action - запрашиваемый документ, то есть путь к файлу, запрос которого будет осуществлен. Путь может быть как абсолютным (с указанием домена сайта), так и относительным. Например:
...Существует несколько различных видов элементов для ввода данных, которые помещаются внутри формы. Элемент, с которого я хотел бы начать, называется submit :
Элемент представляет собой кнопку, нажатие на которой приводит к выполнению HTTP-запроса. Атрибут value задает надпись на кнопке. Форма может содержать несколько элементов submit. Чтобы в запрашиваемом документе определить, по какой именно из кнопок было произведено нажатие, необходимо элементам submit установить атрибуты name . Например:
При формировании запроса веб-браузер включит HTTP-параметр, характеризующий нажатый элемент submit. В качестве имени параметра будет взято значение атрибута name нажатой кнопки, в качестве значения - значение атрибута value. Таким образом, при нажатии кнопки Add будет сформирован запрос:
/control.php?submit=Add
а при нажатии кнопки Edit:
/control.php?submit=Edit
Следующий элемент представляет собой простейший элемент для ввода однострокового текста. Его HTML-код:
name - обязательный атрибут для участия в HTTP-запросе. Значение этого атрибута будет использовано в качестве имени HTTP-параметра. Этот атрибут имеется у всех типов элементов форм.
Элементу можно также задать атрибут value, указав в нем текст, который по-умолчанию будет введен в элементе. Например:
Элемент password служит для ввода паролей. Внешне он такой же, но введенный текст отображается в виде звездочек или точек:
Этого, в принципе, достаточно для создания простейшей формы авторизации. Давайте попробуем ее реализовать, а затем вернемся к рассмотрению остальных типов элементов.
Создадим файл auth.php в корневом каталоге со следующим содержимым:
Авторизация Имя пользователя: Пароль:Как видите, внутри тега form можно размещать теги, помогающие красиво разметить форму (я внутрь поместил таблицу). Форма содержит поля для ввода имени пользователя и пароля с именами login и pass соответственно. При нажатии "Войти" формируется GET-запрос документа /auth.php (то есть, страница запрашивает саму себя). В моем случае полный URL страницы имел вид http://test-domain3/auth.php .
Введите данные и нажмите "Войти". Страница должна перезагрузиться. Должен также измениться и адрес страницы. В моем случае он принял вид:
Http://test-domain3/auth.php?login=Joker-jar&pass=12345
Это означает, что документ auth.php был запрошен с GET-параметрами, которые были введены с помощью HTML-формы. Поместите в начало файла auth.php PHP-обработчик, который будет принимать данные для авторизации:
Если странице были переданы логин и пароль, условие сработает и сообщение будет выведено. Также будет вызван exit , который прекратит дальнейшее выполнение скрипта, следовательно форма выведена не будет.
Передавать пароль с помощью GET-запроса небезопасно, так как он виден в адресной строке. Сменим тип запроса на POST. Для этого изменим значение атрибута method, а в PHP-обработчике обращения к массиву $_GET изменим на $_POST. Проверьте работоспособность скрипта.
Следующий элемент - флажок . Его применяют, когда от пользователя необходим ответ вида "да/нет":
Если флажок не отмечен, в параметрах ничего не передается. Иначе передается параметр name со значением on . Есть еще один момент. Как правило, рядом с флажком присутствует поясняющая надпись. Хорошим тоном является реализация веб-мастером реакции флажка на клики по этой надписи. Делается это просто. Флажку присваивается определенный id, а сама надпись оформляется тегом label с атрибутом for , значение которого равно идентификатору флажка:
Запомнить меняПохожий элемент используется для выбора ответа из набора значений. Допустим, пользователю необходимо выбрать один из трех цветов:
Красный Зеленый СинийОбратите внимание, что у всех элементов одинаковое значение name. Можно выбрать только одно значение. В HTTP-параметра передастся value выбранного элемента, например color=blue .
Чтобы изначально был выбран какой-то из элементов, например, первый, ему нужно задать атрибут checked со значением checked (стандарт XHTML):
Для ввода большого многострочного текста существует специальный элемент textarea :
Текст внутри элементаТекст внутри элемента
Этот элемент, как видите, отличается от предыдущих. Он представляет собой парный тег, а текст помещается не в атрибут, а в тело тега. У элемента также есть атрибут name. При помощи атрибута rows можно задать количество строк в элементе, cols - количество символов в строке. Элемент textarea используется, как правило, в POST-формах, т.к. предполагает ввод длинного текста (например, форма сообщения на форуме).
Выпадающий список. Наверняка сталкивались с таким элементом в программах. Позволяет выбрать одно значение из набора. Код элемента также не совсем обычен. Сначала создается элемент-контейнер select , ему задается атрибут name:
Внутрь контейнера помещаются элементы списка. Элемент списка представляет собой парный тег option , каждому элементу задается атрибут value. В тело элемента прописывается надпись элемента:
Москва Владивосток НовосибирскВ HTTP-запросе передается параметр с именем name и значением value выбранного элемента, например town=vlad . По умолчанию выбран первый элемент списка, если хотите, чтобы был выбран другой элемент, задайте ему атрибут selected со значением selected :
ВладивостокСписок значений. Если элементу select задать атрибут size с числовым значением, выпадающий список превратится в список значений. При этом значение атрибута size будет определять вертикальный размер элемента:
Москва Владивосток НовосибирскМосква Владивосток Новосибирск
Если элементу select задать атрибут multiple со значением multiple (стандарт XHTML), то появится возможность выбирать более одного элемента одновременно (например, с зажатой клавишей Ctrl). В этом случае в HTTP-запросе будут переданы все выбранные элементы с одинаковыми именами, например: town=msk&town=vlad&town=nsk .
Иногда необходимо в HTTP-запросе передать параметр, который пользователь не должен редактировать, а порой даже и видеть. Допустим, вы реализуете форму редактирования новости. В HTTP-запросе необходимо передавать идентификатор этой новости. Для подобных случаев есть скрытый элемент HTML-форм:
Этот элемент не будет виден на форме, но при выполнении запроса будет передан HTTP-параметр name=value.
Иногда может пригодиться элемент, очищающий форму. Кнопка, при нажатии на которую все введенные пользователем данные на форме стираются:
Перечисленные элементы имеют два специальных атрибута:
readonly="readonly" - запрещает изменение информации в элементе (режим "только для чтения);
disabled="disabled" - делает элемент неактивным.
Существует также элемент для выбора файла, который при сабмите формы будет загружен на веб-сервер, но об этом, пожалуй, в отдельной статье.
Login forms are everywhere on the web. Are you using the social networks? You must go through login form of some sort. Do you have an email? Did you join any forums? Did you try to leave a comment on a WordPress site? To gain access to anything on the internet, the chances are you will have to go through some sort of login process. You will probably have to register first, sign up or leave some information behind. You will have to use some sort of login form to do anything on the internet.
So what do Login Forms have to do with HTML and CSS? They are both the essential parts of the Login Forms.
HTML (HyperText Markup Language) is a standard markup language used to create web pages. HTML elements are building blocks of all websites.
CSS (Cascading Style Sheet) is a language used for describing the look and formatting of a document written in a markup language. Such as HTML!
We use HTML to build a website and CSS to make it look nice. That is what most of the users encounter while browsing the web.
We’ve made a list of 50 free login forms that you can use on your WordPress site, blog, forum or anywhere else. This is a hand-picked list by Colorlib to ensure the highest quality of the forms. Each and every form has been thoroughly tested to ensure no components are missing and source code is available with every download. Of course, you are free to use these forms for personal and commercial purposes, with no need for attribution.
Explore 2.5 Million Digital Assets including 2019’s Best WordPress Templates
2M+ items from the world’s largest marketplace for HTML5 Templates, Themes & Design Assets. Whether that’s what you need, or you’re just after a few Stock Photos – all of it can be found here at Envato Market.
DOWNLOAD NOW
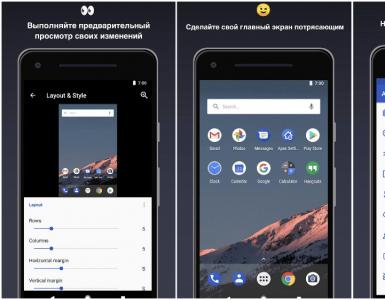
![]() The rest of the list and HTML/CSS powered login forms but here you can see the best login customizer plugin for WordPress. It comes with several defined templates that you can further tweak to match the design of your website. Thats to this plugin you can finally get rid of boring WordPress wp-admin page and create a truly unique experience for yourself and your users.
The rest of the list and HTML/CSS powered login forms but here you can see the best login customizer plugin for WordPress. It comes with several defined templates that you can further tweak to match the design of your website. Thats to this plugin you can finally get rid of boring WordPress wp-admin page and create a truly unique experience for yourself and your users.
Simple yet creative login form created using HTML5 and CSS3. This form can be used as registration form as well. This is our favorite template on this list thanks to its flexibility and similarity that allows you to create
WordPress versionWe did search the internet for cool login forms but it was very difficult to find good looking ones therefore we decided to have our take on them. We would like to present 20 login forms designed and developer by Colorlib team.
Login Form 1 by Colorlib
Simple, creative and vibrant login form with a gradient background. You can use this one for all sorts of intentions, like web, mobile or desktop applications. But do get creative with it if you like.

Minimal and sophisticated login form by Colorlib with a gradient button with animation and a logo. Use it, alter it and have it as a nice addition to your already nifty web space.

A gorgeous login page with a background image with shadow and a gradient form box with login button hover effect. The only limitation that you have is your imagination, so expand your view and use Login Form 3 to its full potential.

Creativity knows no limits and nor does Login Form 4. Here it is, at your disposal, ready and set for you to download it and put it to some good use. Do not worry about the responsiveness either.

Gorgeous, clean and modern form with an option to log in with Facebook or Google. All buttons have a nice hove effect that spices up the experience.

If your page is already super neat and tidy, a login form should be no different. Here is one that will easily meet your expectations if minimalism is your cup of tea.

A form with a three-way option of logging into the account. Either it is Facebook, Twitter or email login they prefer, this is the type of a tool that you need to feature on your page. And if they do not already have an account, you can also link it with your sign up page.

Another contemporary, trendy and enticing login form with rounded everything. This one is especially applicable to mobile users due to its currently very popular rounded corners style.

If you would like to avoid the white or single-color background, this is the login form page that you should consider. Not only does it support a full image background, but it also comes with a gradient overlay and an option to log in with Facebook or Google.

A somewhat complete opposite compared to the previous one is Login Form 10. It almost could not be more minimalistic looking while still having this up-to-the-minute feel to it.

With our collection of the best HTML5 and CSS3 login forms, you save yourself time and effort (money, too). Instead of building one from scratch, here is another killer ready-to-use template for you to employ.

Image background with a blue shadow overlay, name, image and the must-have form, that’s what’s up with Login Form 12. There is also a cool hover effect on the login button and gives you a chance to link it with your registration form for all new users.

A split screen sign up form, where one half is dedicated to an image and the other half to the form. It is a free tool which you can start using this very moment. Just download the layout and go full tilt with it.

In this collection, we have a mixture of simplistic and those a tad more complex and advanced login forms. In short, there is something for everyone and Login Form 14 is more on the minimalistic side. But why even complicate with a login form, right? To each their own.

While still keeping things to the bare minimum, one cool addition to the Login Form 15 is the image banner just above the form. With this little feature, you can make the experience slightly more engaging.

This is a login form with a full-screen image on top of which is placed a form with username and password fields and a gradient button with hover effect. Simple and straightforward.

To make it appear more personal, this framed login form template is the best fit for you. It has an image side and a form side but keeps things to the very minimum while still ensuring professionalism.

If you like to differentiate yourself and keep things original, do consider using Login Form 18. While some enjoy login pages super basic, the others want to have some additional goodies rocking the layout. And if adding a picture is what you are after, this one is for you.

Vibrant, energetic and attention-grabbing, that is what this next login form based on HTML5 and CSS3 is all about. It is also fully responsive and mobile-ready, as well as compatible with all major web browsers.

Gradient background, black sign in button with hover effect, username and password fields along with custom text and “Forgot password?” section, yep, that’s all part of Login Form 20. Sounds overwhelming but in reality, far from it.

The form is hidden unless you click on “Login” option. Really great feature for modern websites that want to avoid having a separate page for the login form. You can display the form anywhere on your website with this powerful tool.
Download
A design for a Sign Up form using tabs and floating form labels.
Download
What was initially made to stop people from entering one person’s WordPress site, it became a really popular form due to its simplicity and neat design.
Download Flat Login – Sign Up Form
Once you click “Click me” button in top-right corner, you will get smooth animation that transforms this Login form to Sign up form.
Download Login With Self-Contained SCSS Form
This is a form with self-contained SCSS. An extension of CSS that adds power and elegance to the basic language. It allows to use variables, nested rules, mixins, inline imports, and more.
Download
This is actually an animated Login form, with top “Hey you, Login already” transforming into the form at the bottom. Smooth animation effects.
Download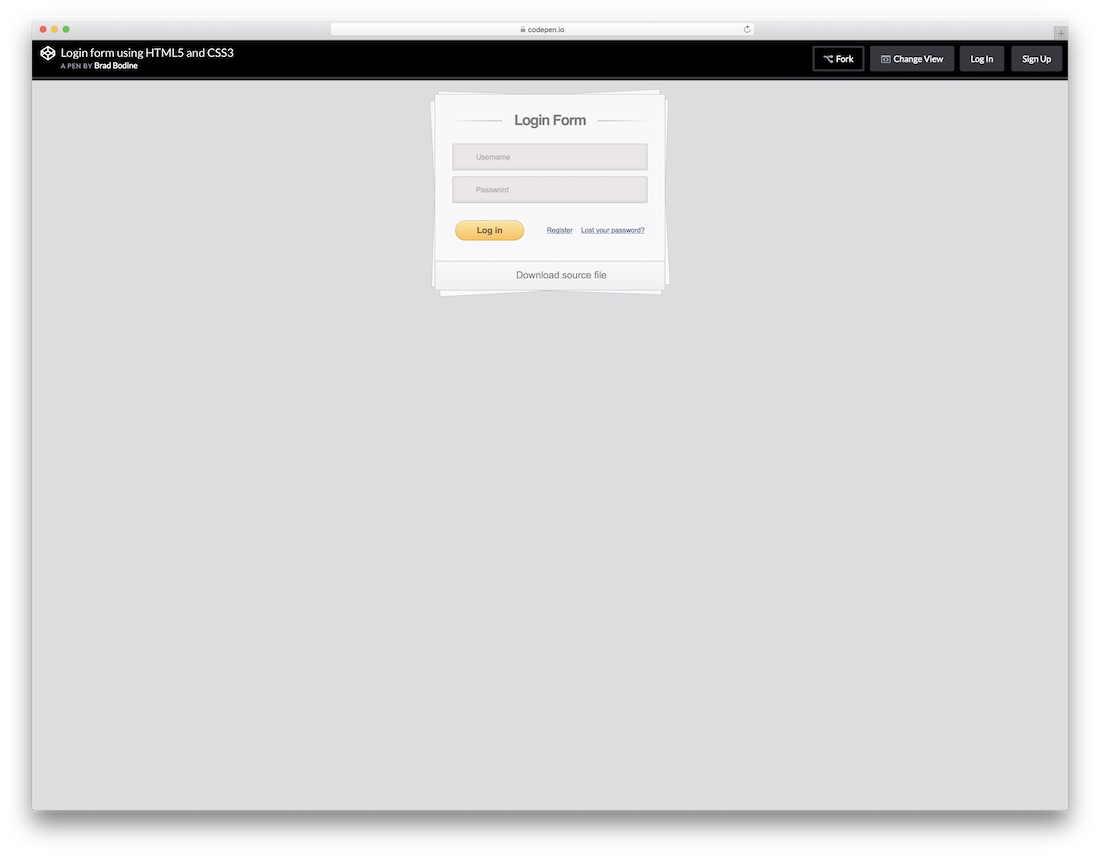
This is an example on how to create a simple login form using HTML5 and CSS3. This form uses pseudo elements (:after and:before) to create the multi page effect. These elements are rotated using the CSS3 transform property. This form uses HTML5 to make validation and submission easy.
Download
Once you enter a wrong password in this form, a nice shake effect will warn you that you did not enter the correct password. A simple and effective solution that will point out the problem of incorrect passwords.
Download
A boxy login form with a little surprise. Try “admin” as a username, and “1234” as a password, for full experience.
Download
Neat little login form. Once you click on “LOGIN” on the left side, animation effect creates neat little login form on the right. Definitely unique approach!
Download Material Design Form
Fairly simple and easy on the eye login form that you can add to your blog or any other website and spice up the experience. No need to overcomplicate with a simple thing as the login form is. Even if you are just collecting subscribers, you can also play around with this layout and get things rocking.
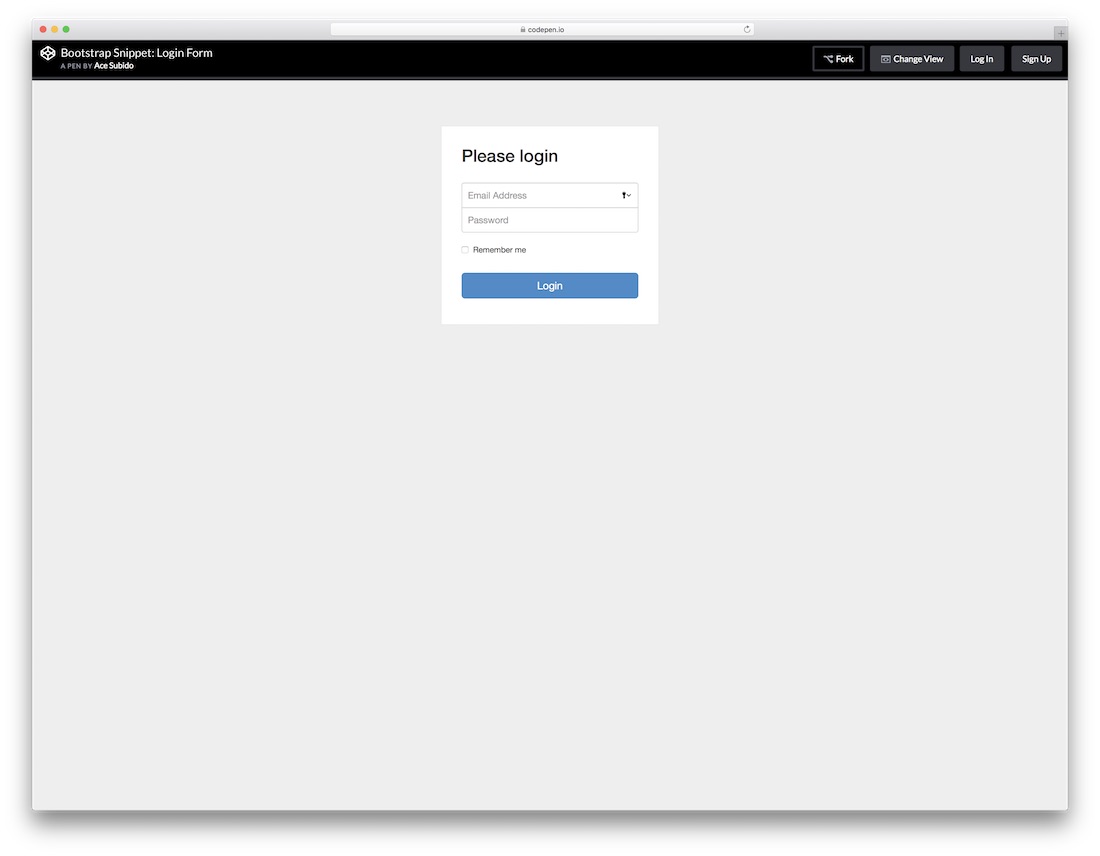
Obviously, this next free HTML5 login form is based on the well-liked Bootstrap Framework. This tells you that you can expect some nice flexibility that any modern website and element must practice. Email address, password and a check box to tick if a user would like the platform to remember his or her information. Easy and to the point.

Regardless of your main web design, with things like login forms, you do not want to over complicate it. Instead, you would want to keep it simple and let it to the job, getting users to access their accounts seamlessly. You will achieve that goal with this login form with flat UI unquestionably.

From super simple login forms to those with slightly more action going on. This particular one is pretty similar compared to the last one just that you will notice a frame going all around the form. Get them to type in their names or usernames and passwords and they can enter your world of amazingness.

All the HTML5 and CSS3 login forms you find on this list are simple to use and effortless to attach to your web platform. This one even has a “Forgot your password?” right at the bottom for everyone who just cannot recall their passwords. The template is perfect for entering your dashboard, but you can apply it for other needs, too.

The title pretty much says it all; this is a neat, clean and minimal looking login form with recovery. What you also notice is that there is no traditional “box” that you are used to seeing login forms use. If you would like to make a difference, you now know which layout to choose.

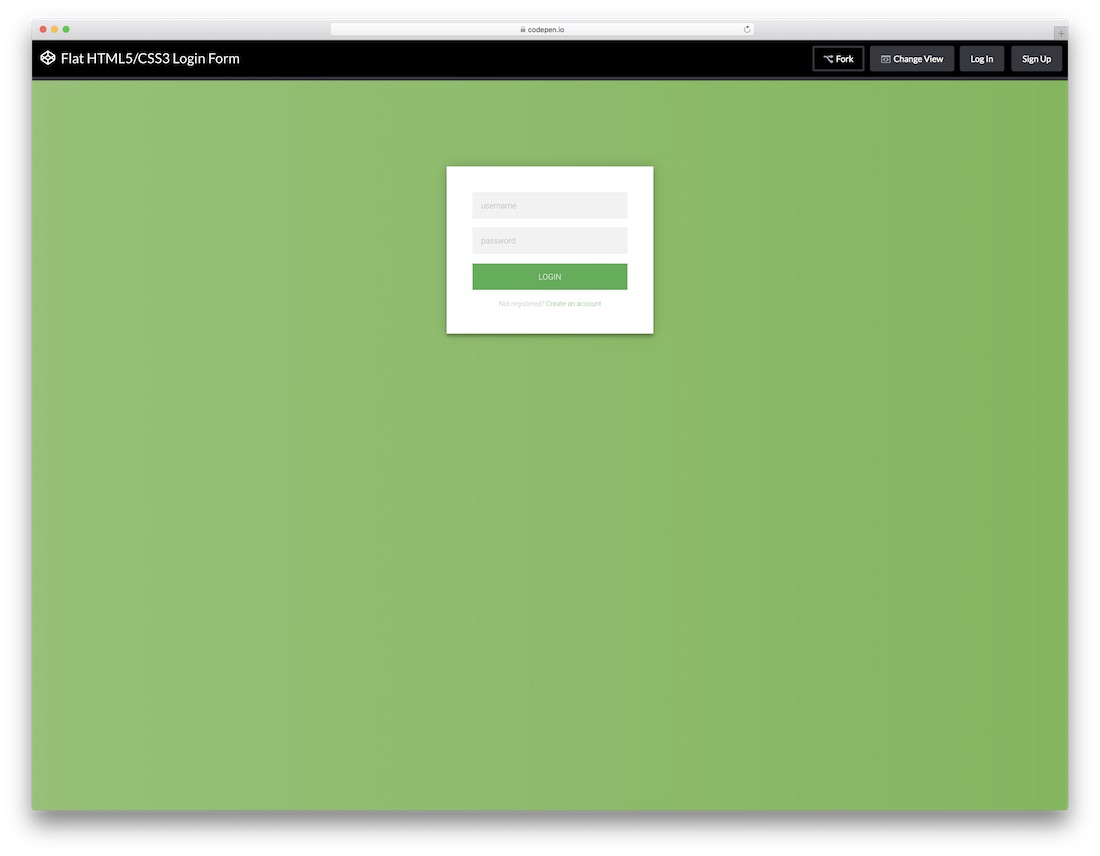
A free flat login form with a stunning and elegant dark layout coupled with a green call-to-action button. Sure, you can alter the tool to your likings, but you can also employ it exactly as is and have it live on your website in a snap. Play around with its features and have it all set up the way you like it.
![]()
Even a login form can be of super creative and attention-grabbing nature. While many stick to the simple and basic look, there are others who like it special and exclusive. This transparent login form will surely do the trick for you. With an image background and a form over it, this layout can follow your branding to a T.

No need to be really going too in-depth with this next login since it is pretty self-explanatory. It is compatible with the Google Chrome extension, as well as features buttons for those who are not signed up yet or lost their password. If this is the one you were looking for, then scrolling all the way this far was more than worth it.

A stylish flat form which you can append to your web space as a pop-up or ad as a widget on a page. Whatever the case, it will keep your professional approach intact. It is simple and easy on the eye and also has a CTA for everyone who missed signing up to your members’ area. Use it as is or improve it according to your taste.

Definitely an approach to a free login form that you should not miss. It has a feel of a coupon just that it is not if that even makes any sense. Anyhow, in the text section, you can also link this form to the signup form for those interested in creating an account. Other than that, it surely will capture their attention.

More and more website owners are implementing social logins and you can join the trend as well. This free login form with social integration is the right option to take the plunge. However, along with Twitter, Facebook and Google+ buttons, the layout also features the traditional way of signing up with an email.
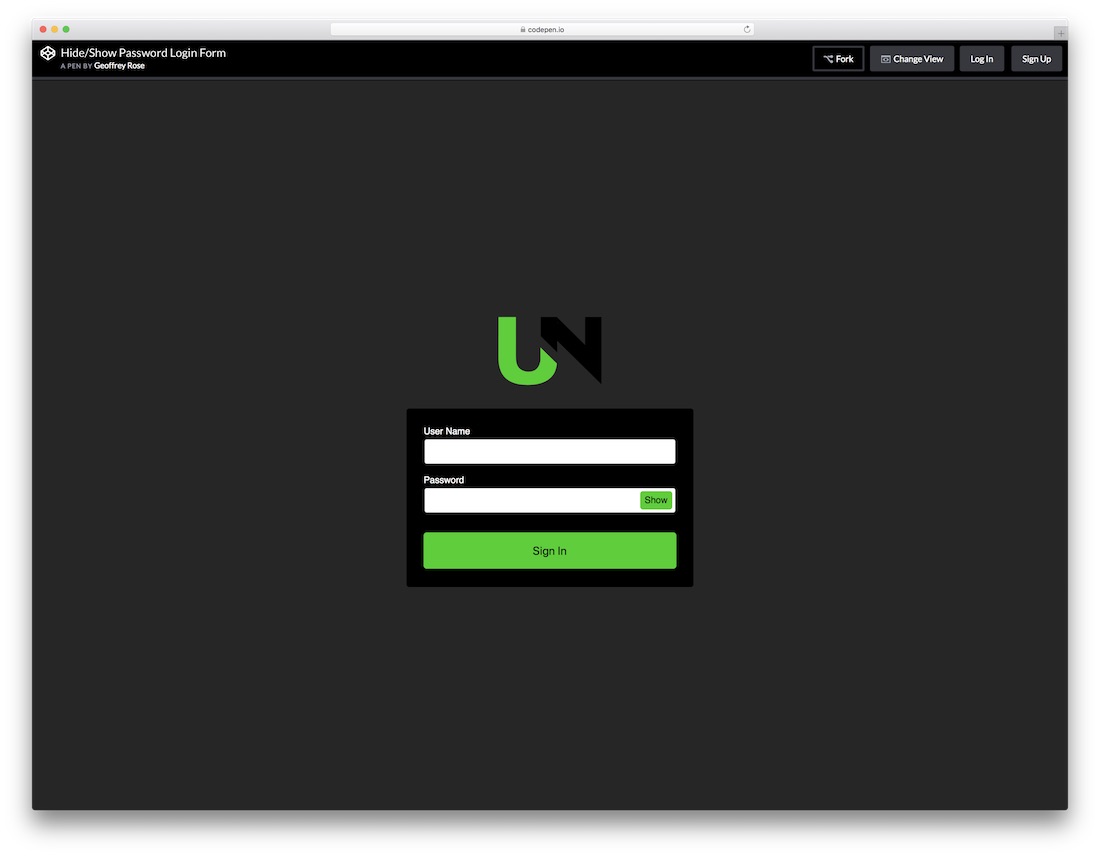
If your password is super complex, you sometimes just want to enter it in a “show” mode. Offer this same feature to all your users with the show and hide password login form. It has a stunning dark layout with green details perfect for those who dig this type of designs. Of course, feel free to make changes to it and fine-tune it according to your needs.

If you already practice animations and special effects on your page, keep the trend with the login form, too. Instead of creating your own one, you can simply use this striking Log ‘N Load animated form that will do the trick. Once you hover over the login button, the form reveals right in front of you. It even has a circular loading that enhances the experience.

This flat, modern and easy to use login form works great on all devices, mobile, tablet and desktop. You can also play around with different tweaks and alter the default settings to your website’s style precisely. The tool also has cool hover effects that add a touch of sophistication to the overall experience.